
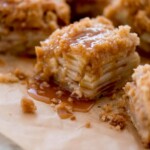
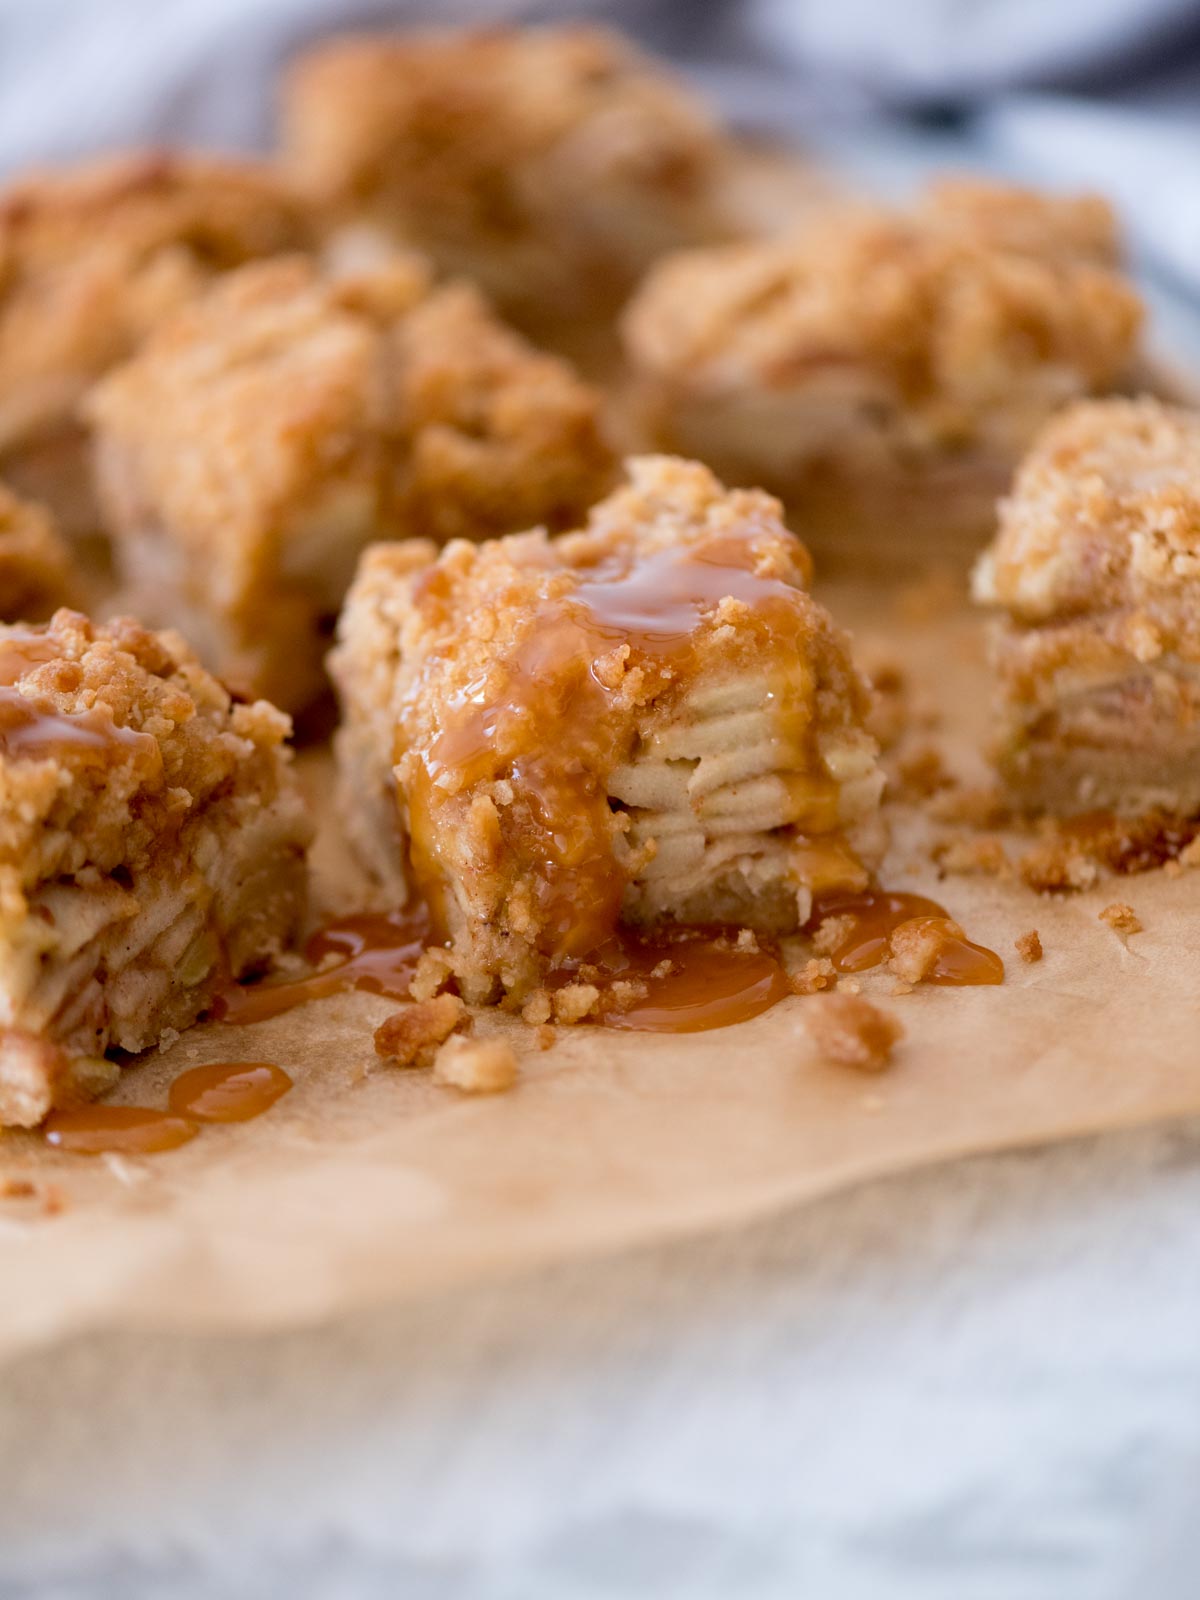
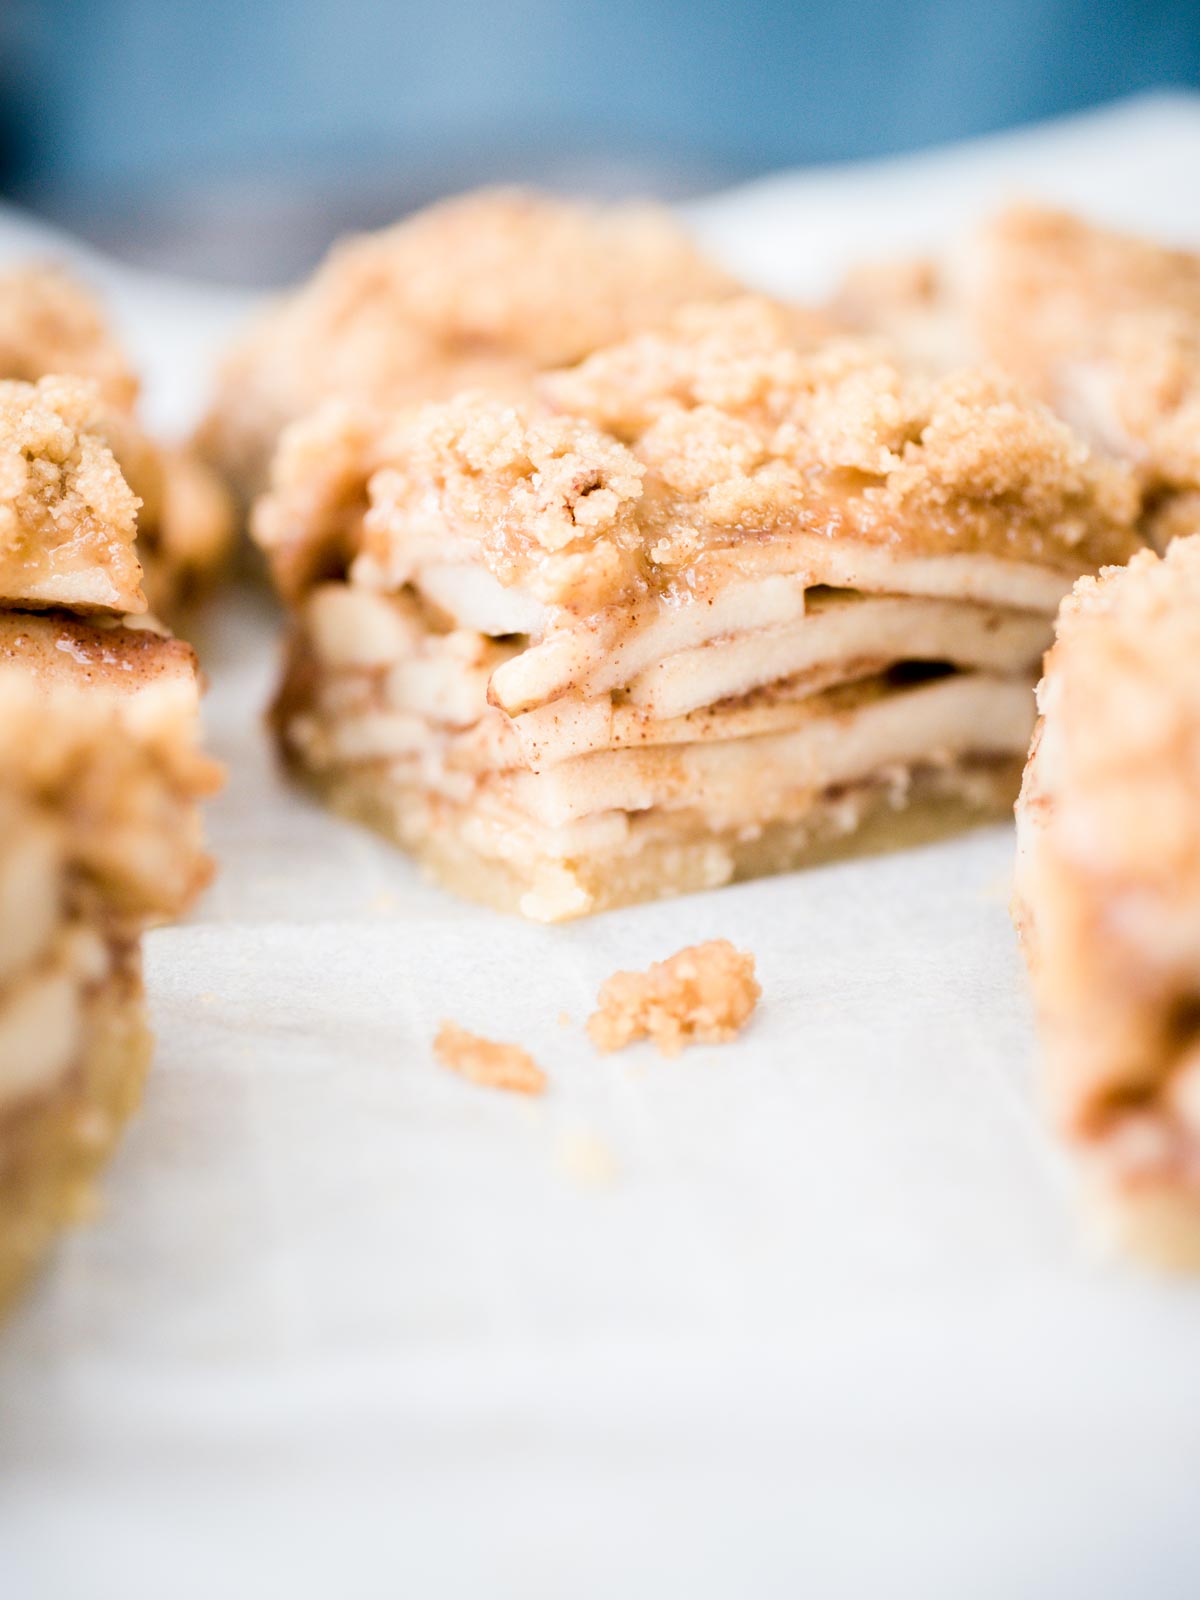
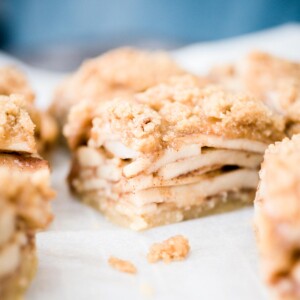
These Dutch Apple Pie Bars take all the best parts of a classic apple pie—the tender apples, cozy cinnamon spice, and buttery crust—and layer them into an easy-to-make dessert that’s perfect for any occasion. What sets this recipe apart? It’s loaded with five irresistible layers of apples, making it more indulgent and satisfying than your average apple pie bar recipe. Trust me—this is the only recipe you’ll ever need.
This recipe holds a special place in my heart because it’s a modern twist on the apple pies my family has made for generations. Growing up in Texas, apple pie was always on the table during fall gatherings, and I wanted to create something with all the nostalgic flavor, but in a format that’s easier to share and serve.
These apple pie bars are my answer to that—a handheld dessert that’s just as satisfying as a slice of pie but without the hassle of rolling out dough or serving individual slices. Every bite delivers the perfect balance of sweet, spiced, and buttery goodness.
Whether you’re bringing them to a holiday party or enjoying them as a cozy family treat at home, these apple pie shortbread bars deliver all the comfort of pie without rolling dough or slicing perfect pieces.
Why you’ll love this easy apple pie bars recipe
- Easy to Make: Skip the pie crust! These bars are made with a simple shortbread base that’s quick to mix and press into the pan.
- No Special Tools Needed: All you need is a baking dish and a mixing bowl to whip up this bar recipe—no rolling pins or pie pans required.
- Easy to Share: They are easy to cut, serve, and enjoy. You can eat them with your hands or with a plate and fork.
Dutch Apple Pie Bars Ingredients
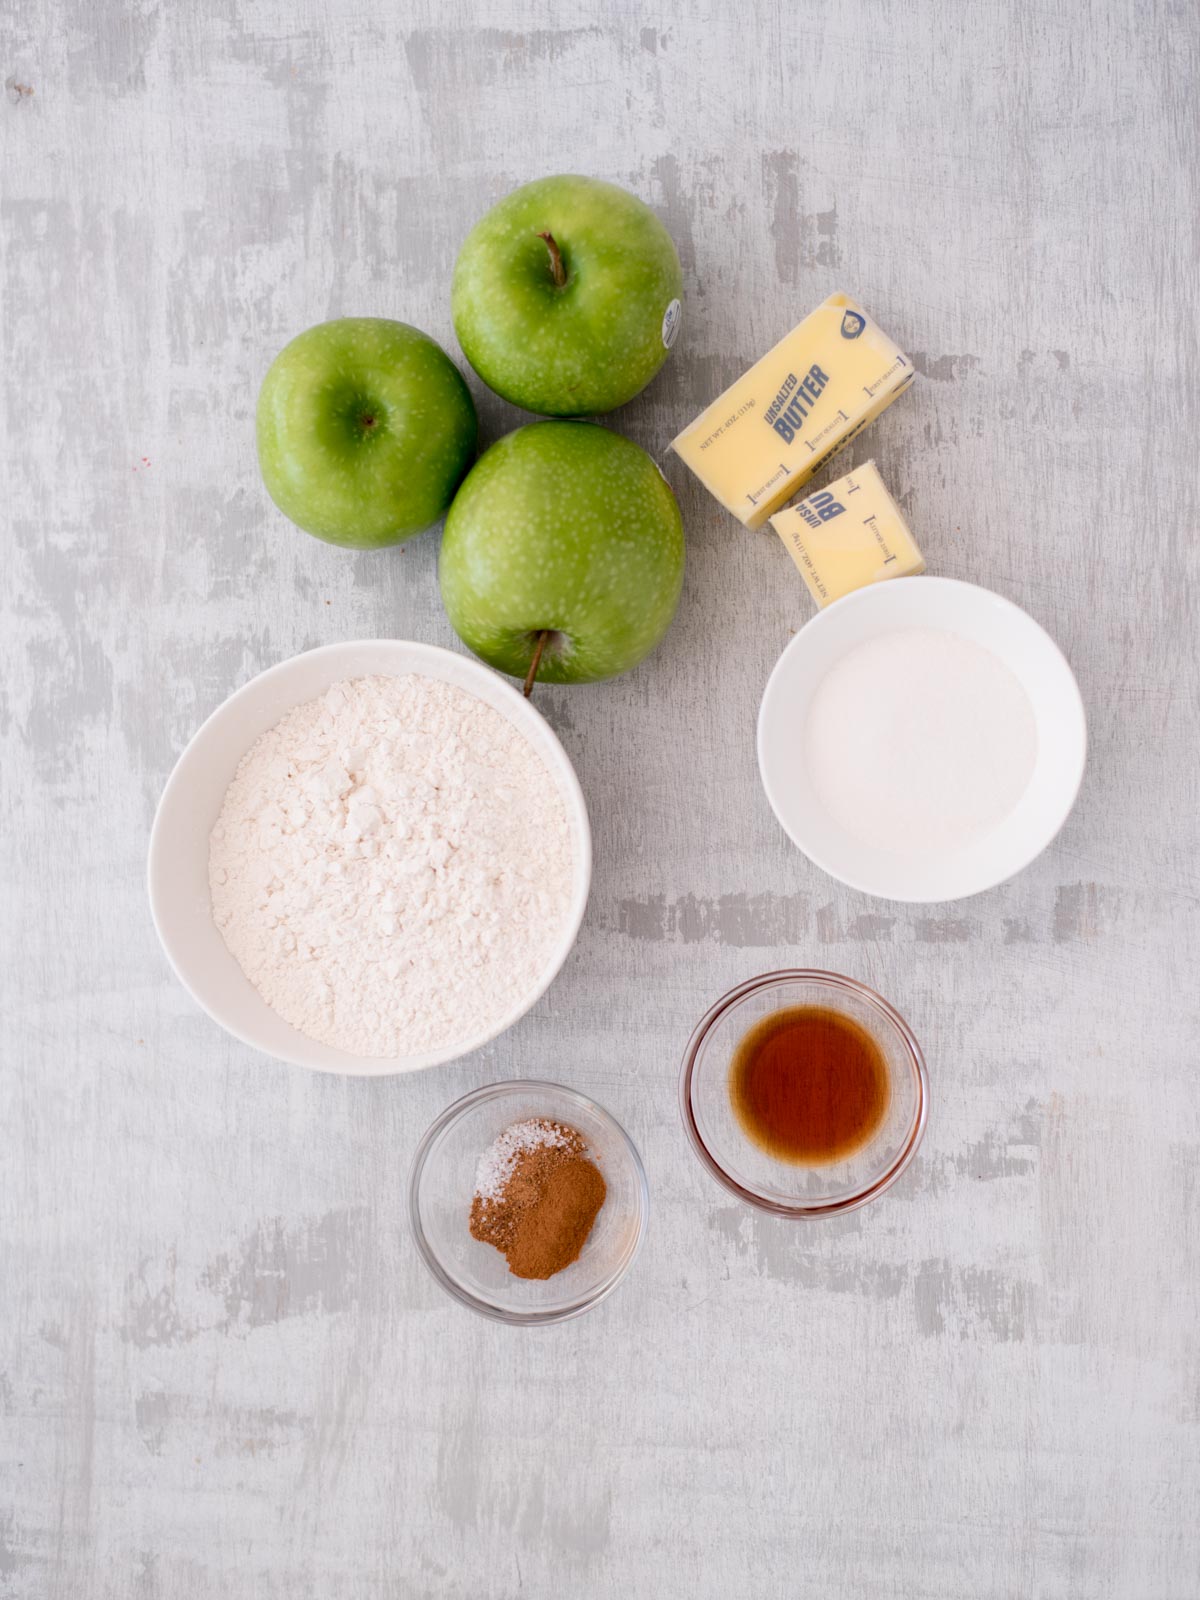
- Granny Smith Apples – I recommend sticking with granny smith apples for this recipe. The tart flavor stands up well to the sweetness and sugar.
- Unsalted Butter – Unsalted butter works the best in this recipe because there’s a pinch of salt added later to control the flavor.
- Sugar – you’ll want to use granulated white sugar for this.
- Brown Sugar – light or dark brown sugar both work well.
- All-Purpose Flour – be sure to use all-purpose flour.
- Vanilla Extract – your favorite vanilla extract will do just fine in this recipe.
- Ground Cinnamon and Ground Nutmeg – these spices are what truly make these apple pie bars the best.
- Salt – coarse kosher salt or sea salt works best.
How to make apple pie bars with fresh apples
Making these apple pie bars with crumb topping is easier than you might think, and it all starts with the perfect shortbread crust.
Preheat your oven to 300°F. In a mixing bowl, cream together ½ cup of room temperature butter, ¼ cup of sugar, vanilla, and a pinch of salt. Beat it for about 3 minutes—you’re looking for a light and fluffy texture here.
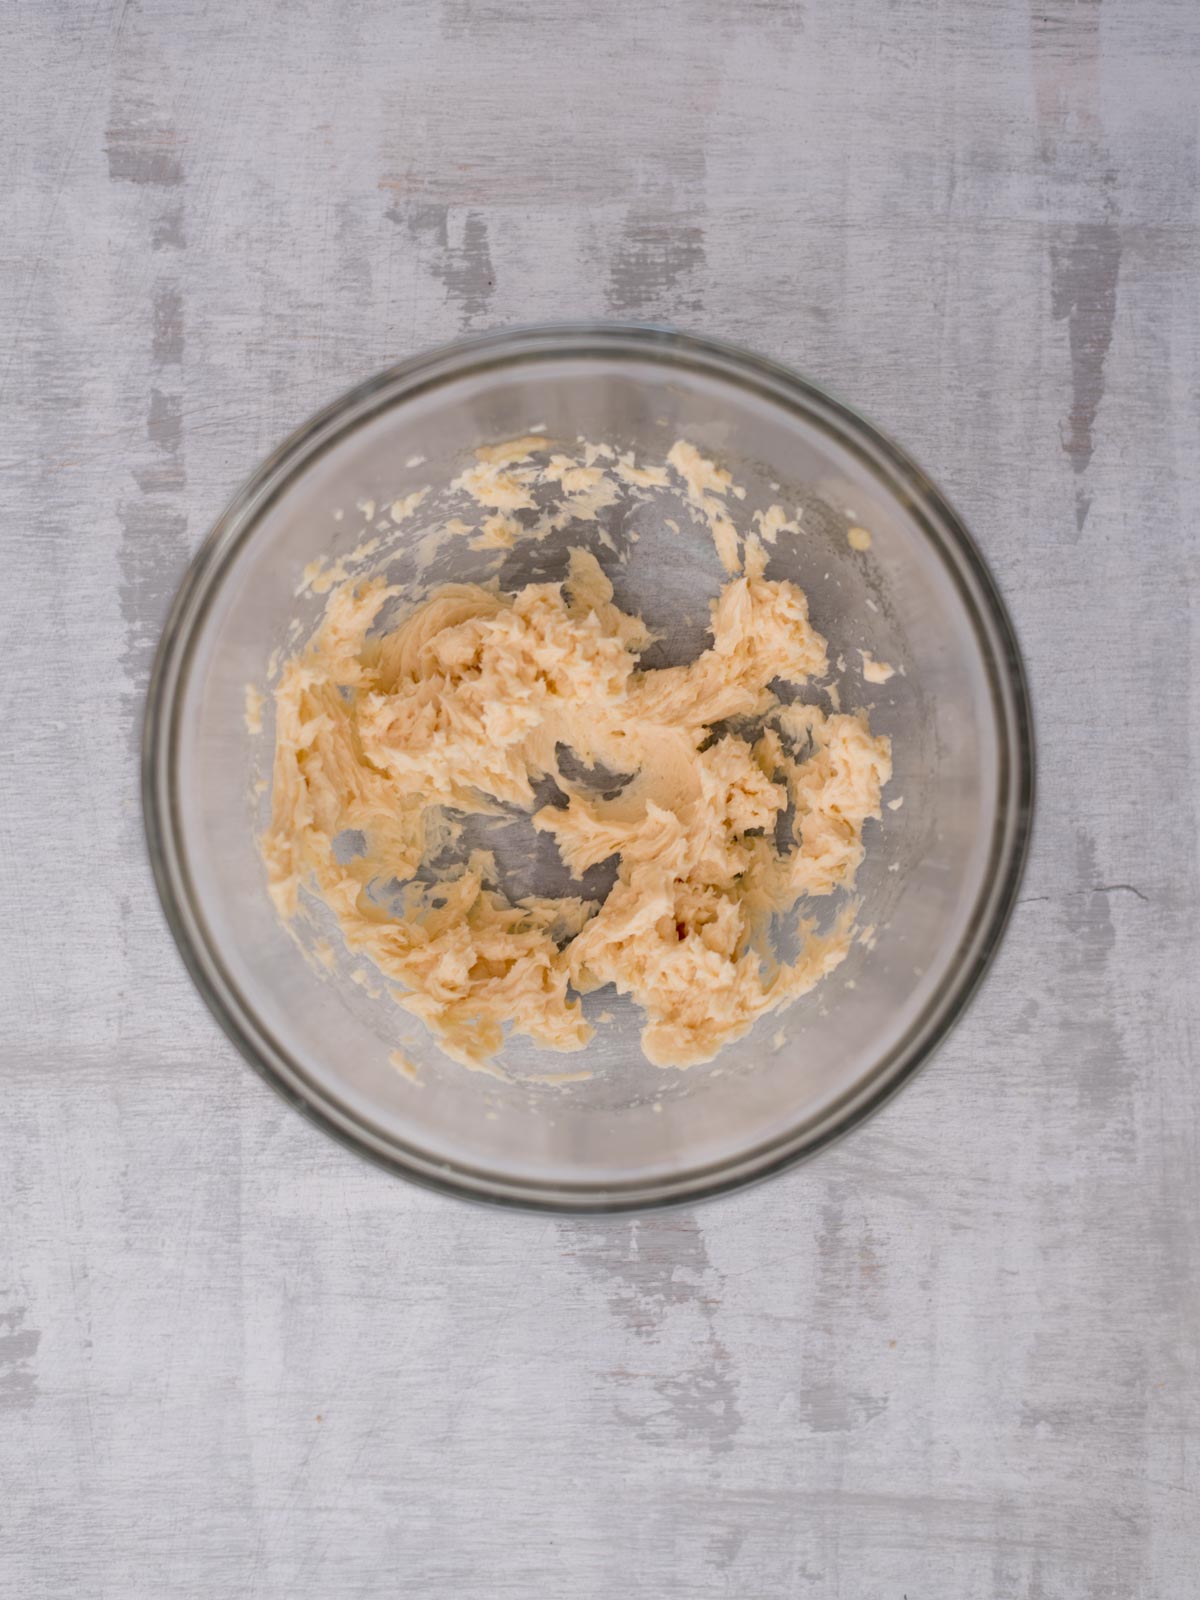
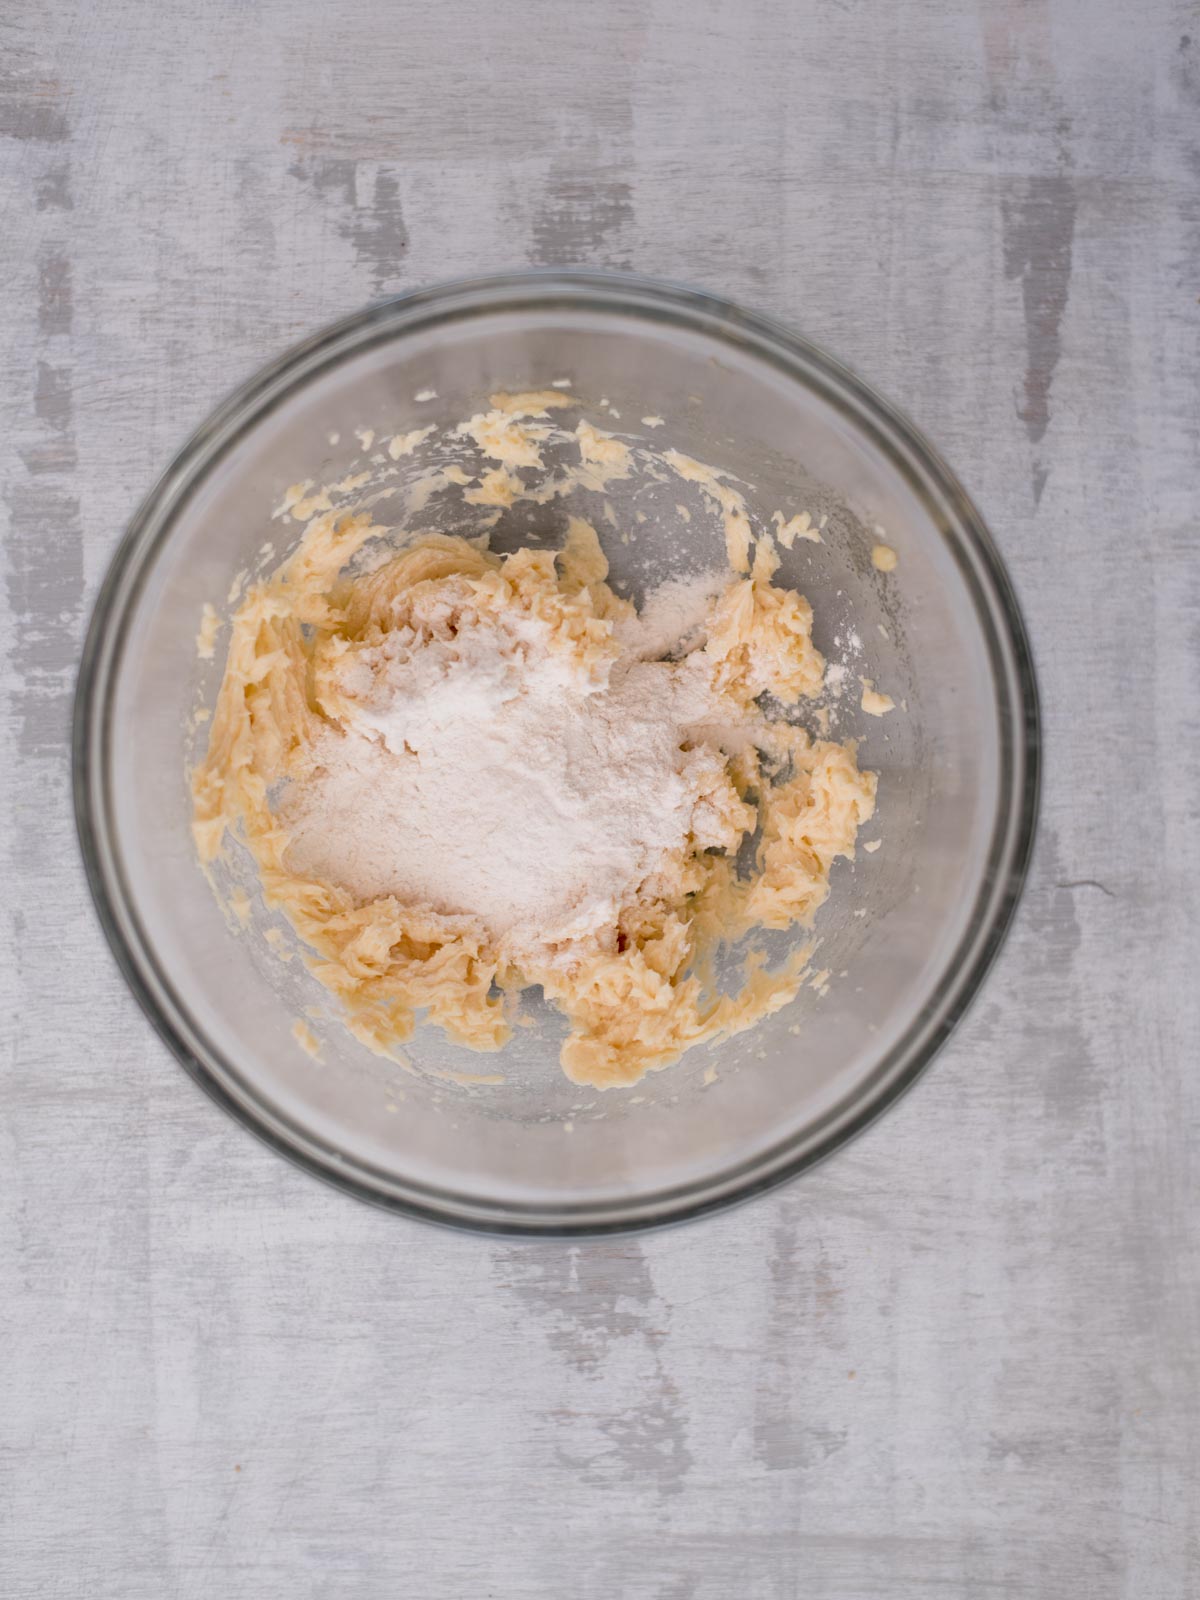
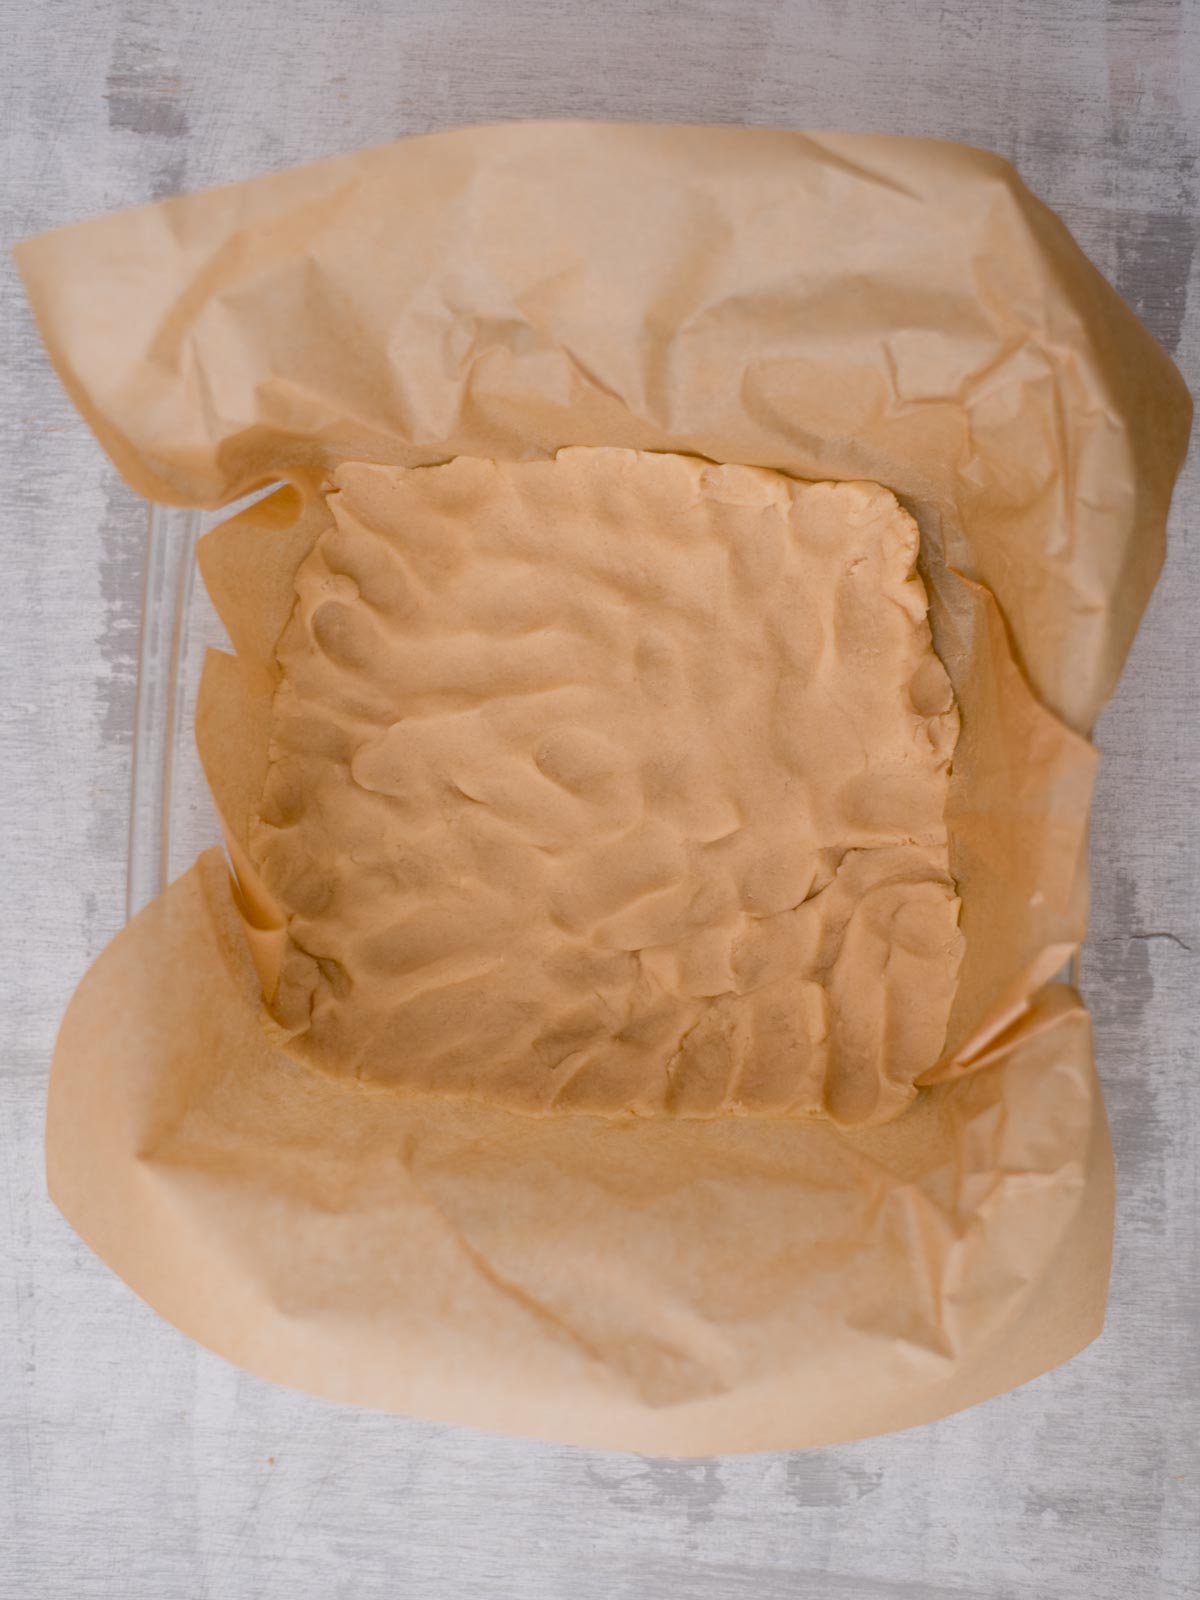
Slowly add 1 cup of flour, ¼ cup at a time, so everything blends evenly. Once combined, press the dough into a parchment-lined 9×9 or 8×8 glass baking dish. A quick tip: use the back of a spoon or your fingers to smooth it out evenly. Bake the crust for 12 minutes, just until it’s set.
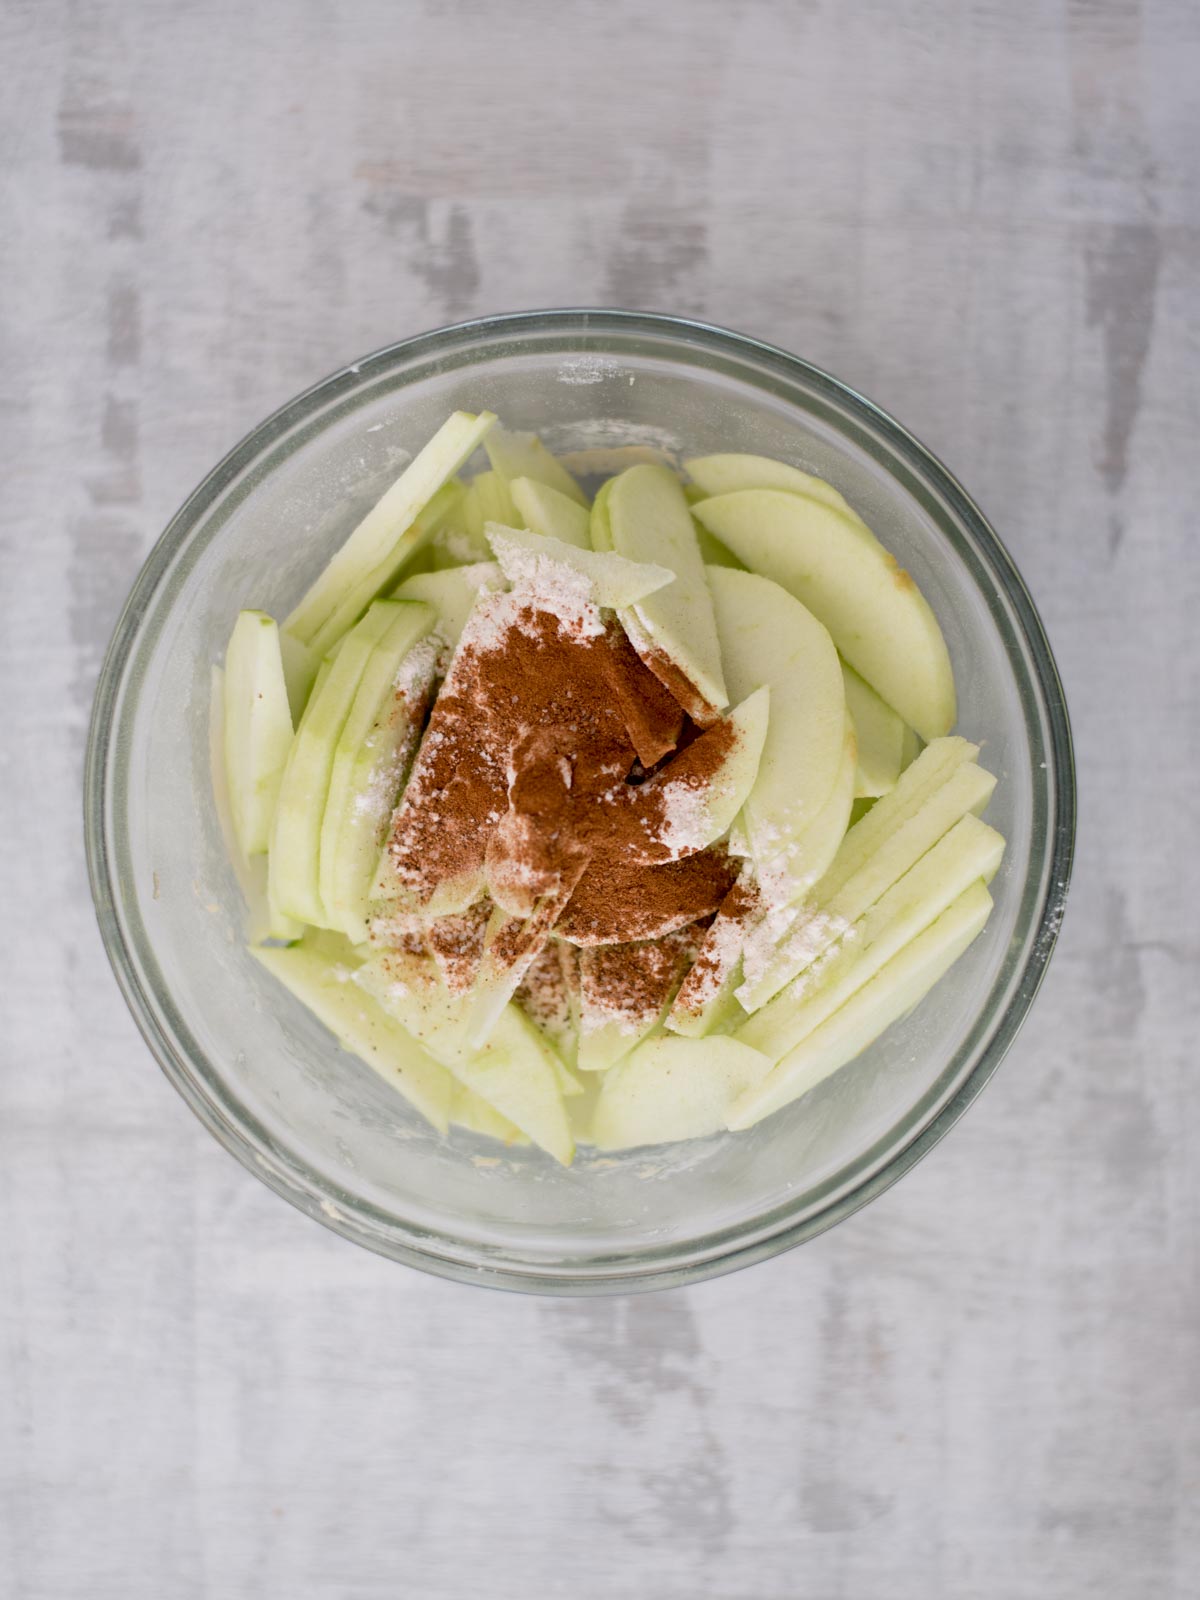
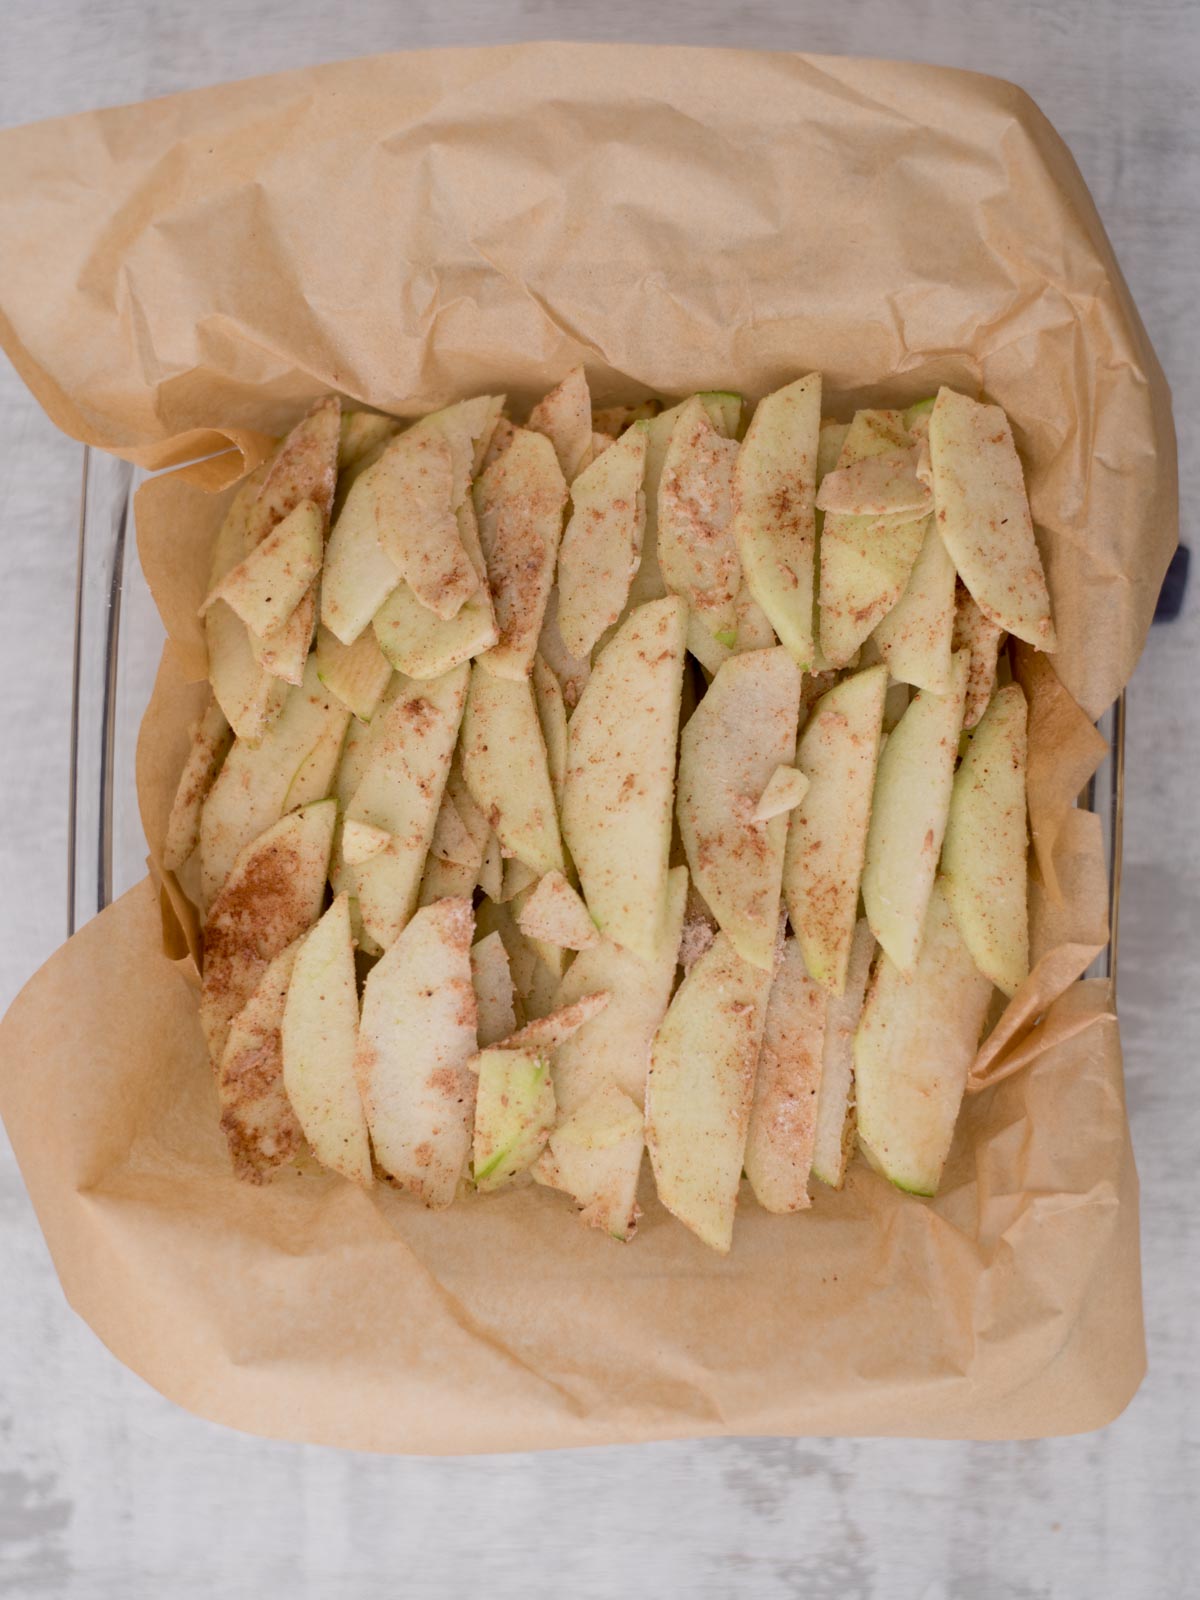
While the crust is baking, it’s apple time! In a bowl, toss your sliced apples with 2 tablespoons of flour, 2 tablespoons of sugar, cinnamon, and nutmeg. Make sure every slice is well-coated—that’s where the flavor magic happens. Don’t skip the step of tossing the apples thoroughly; it helps the filling thicken just right as it bakes. Once coated, set the apples aside until you’re ready to layer.
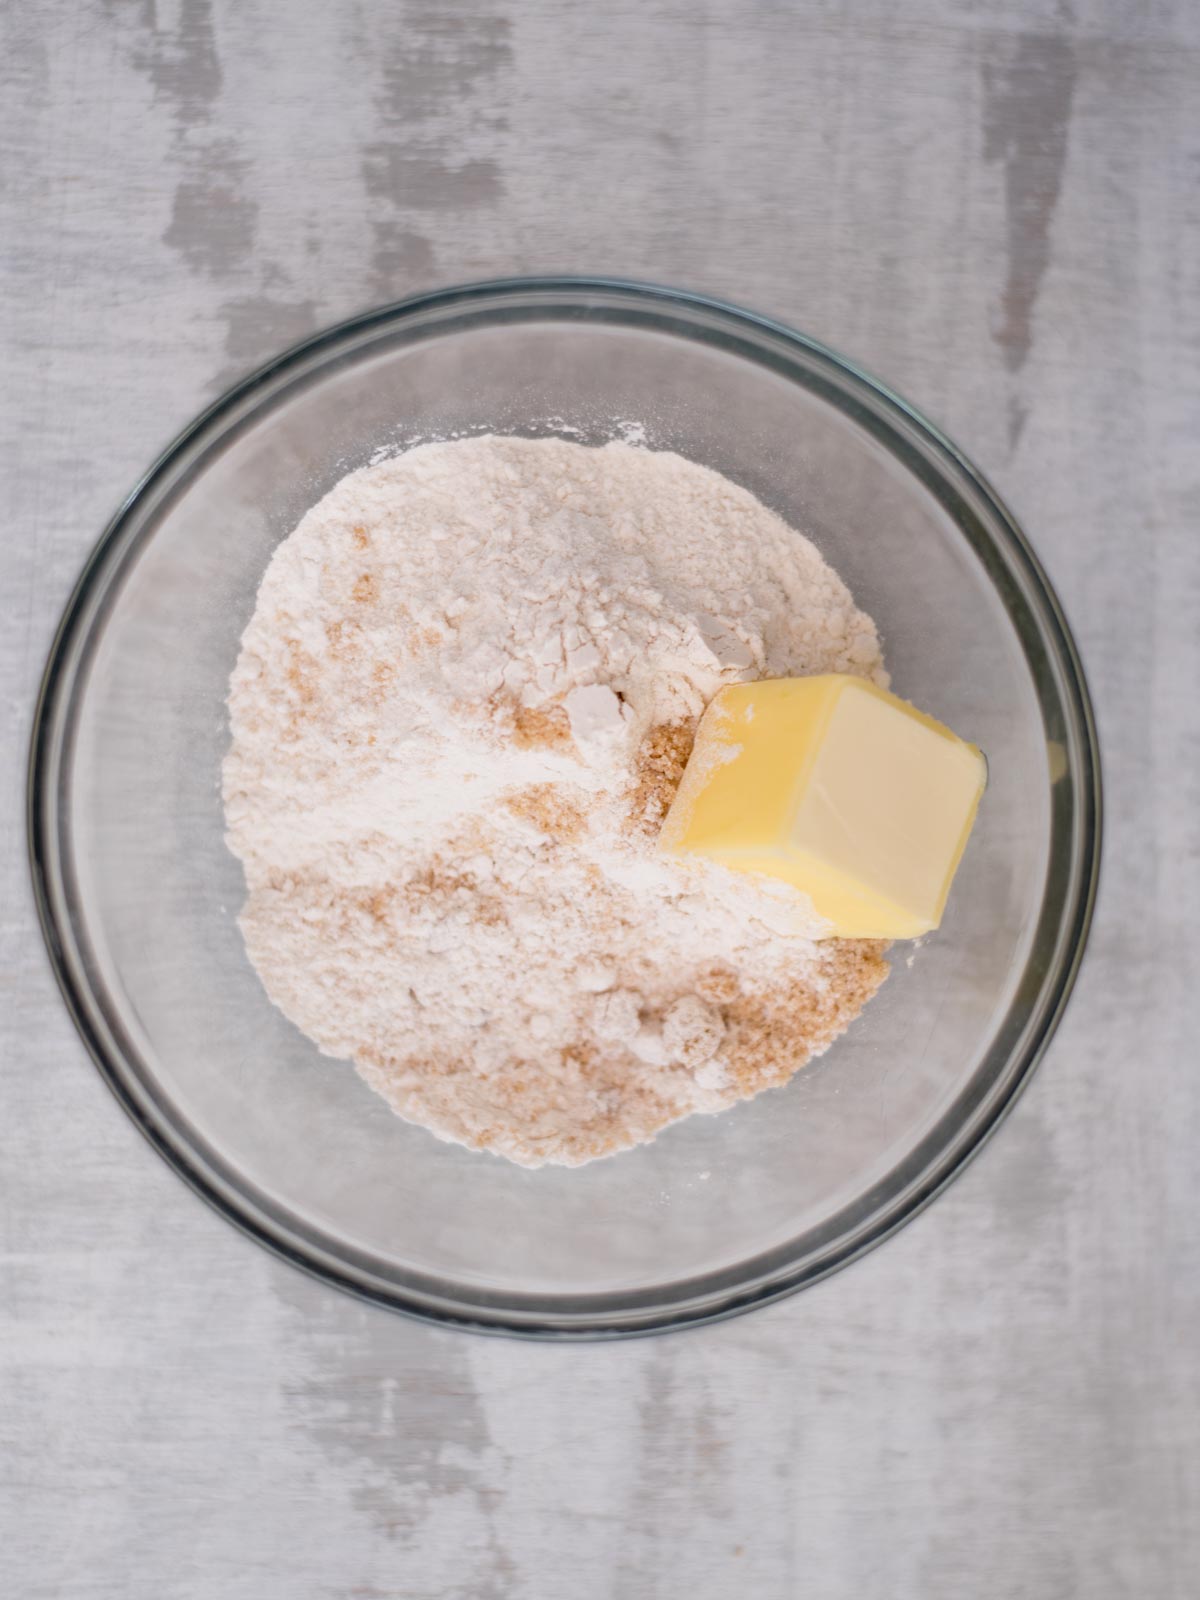
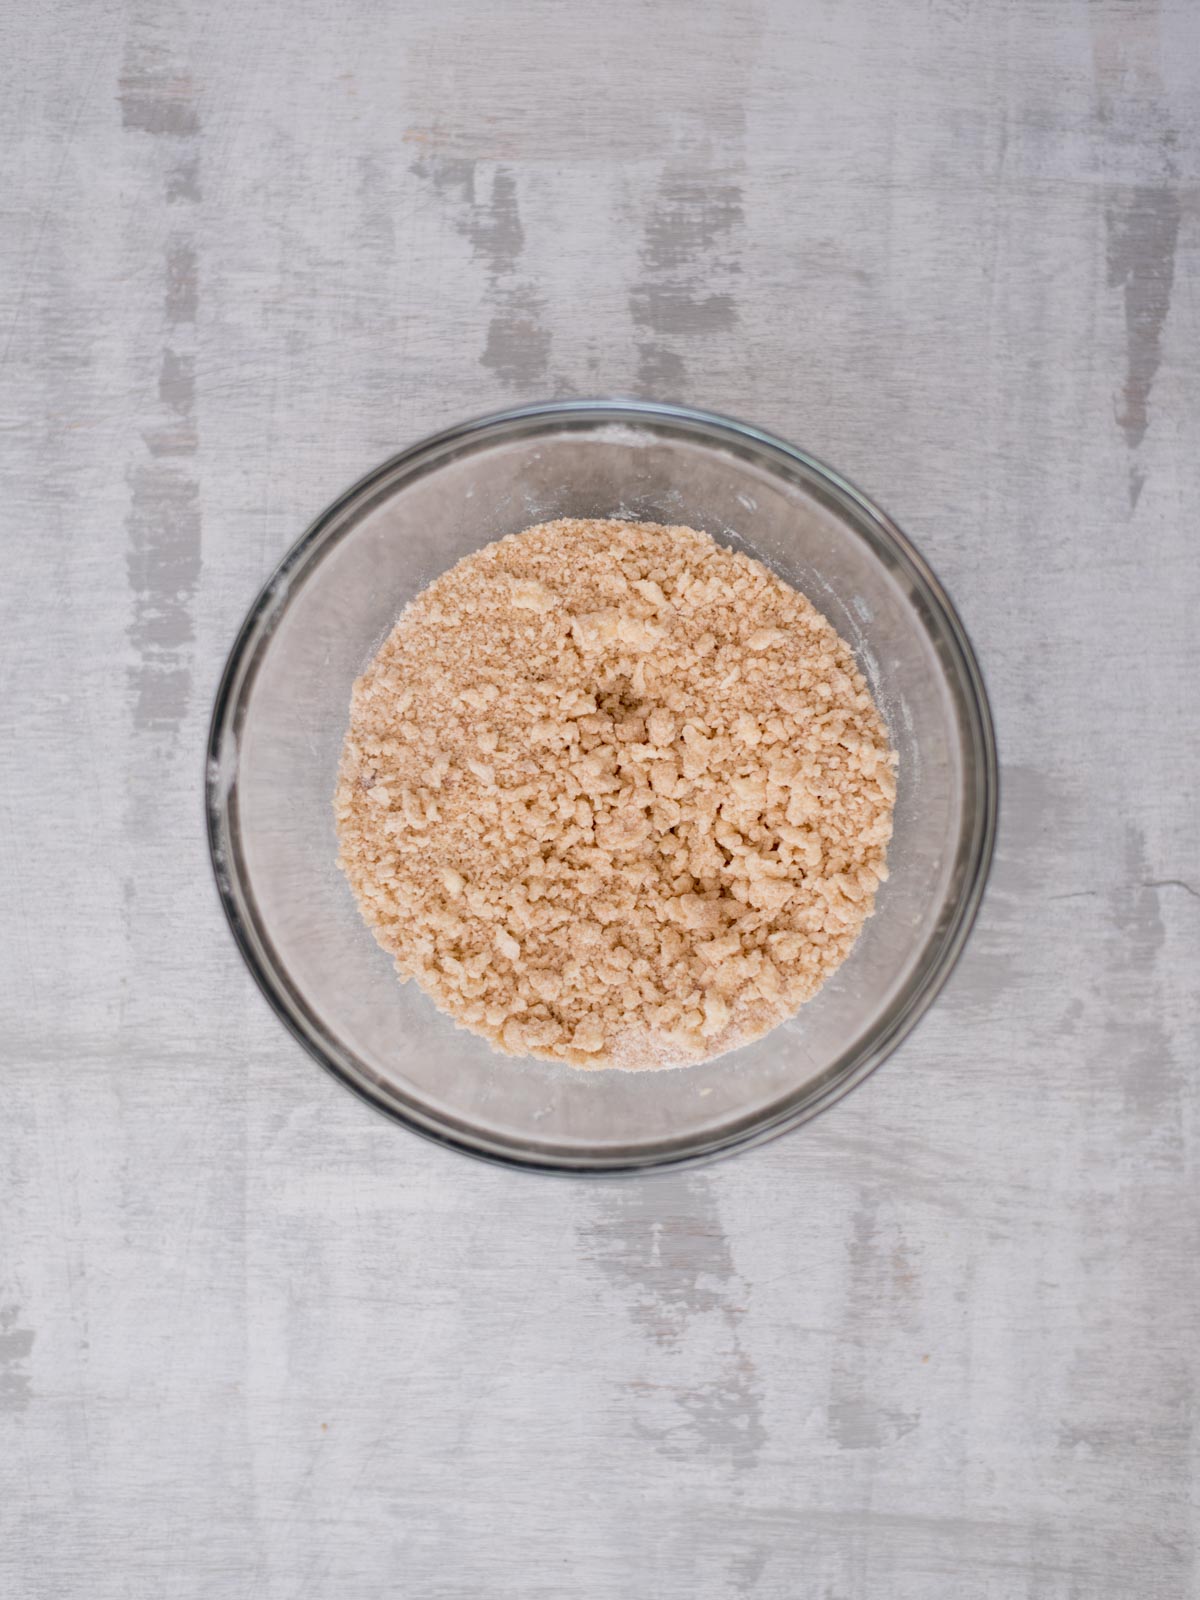
Now for the crumbly goodness. In a separate bowl, mix ½ cup of flour and brown sugar. Add the remaining ¼ cup of butter and grab a whisk (or a pastry cutter if you have one). Cut the butter into the dry ingredients until the mixture looks like chunky sand—perfect for that crispy, crumbly texture on top.
By now, your crust is ready and slightly cooled. Take your spiced apples and layer them evenly over the crust. Go for five layers of apples if you can—it makes these bars extra loaded and ensures every bite is full of flavor. Once your apples are layered, sprinkle the crumb topping evenly over the top. Don’t skimp here; the topping adds that beautiful crunch you’ll love!
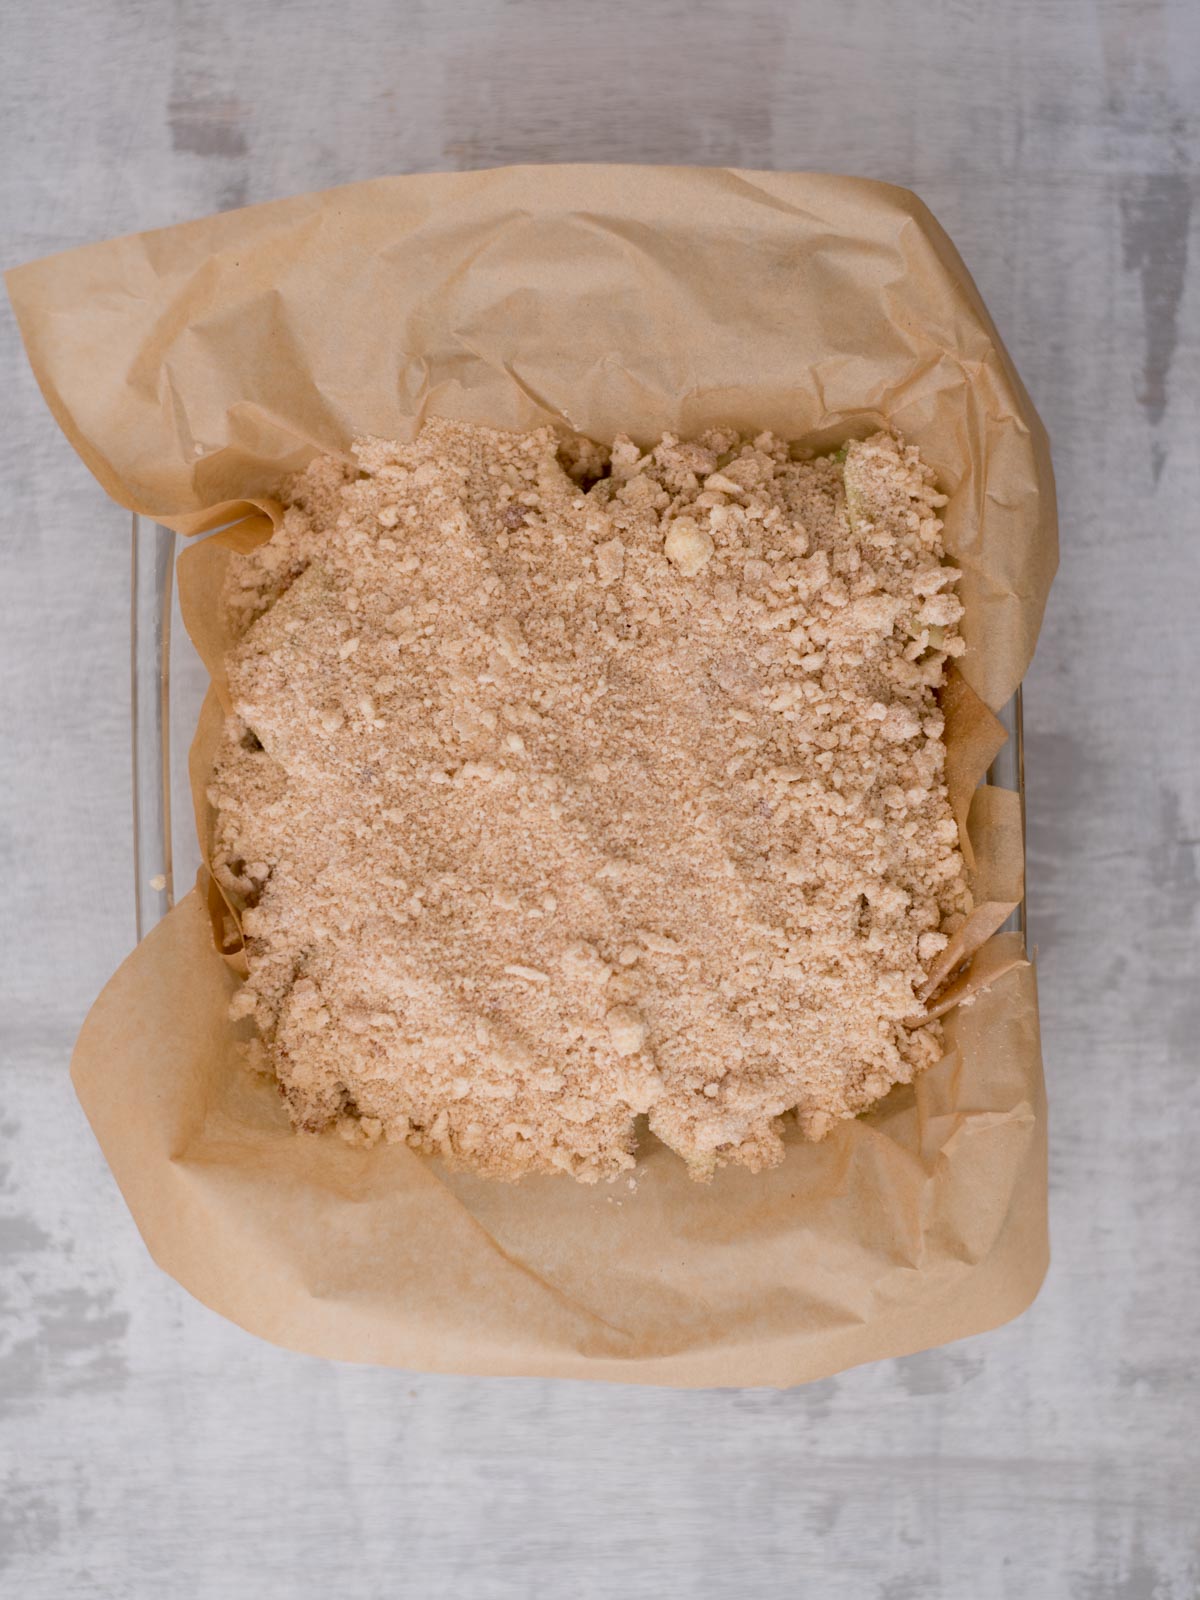
Turn up the heat—literally! Increase your oven temperature to 350°F and bake the bars for 25 minutes. Your kitchen will smell amazing as the apples soften, the crumb topping turns golden, and the layers meld together. Keep an eye on the topping toward the end so it doesn’t overgrown.
Once baked, resist the temptation to dive in right away (I know, it’s hard). Let the bars cool completely in the pan—about 30-45 minutes. This cooling time helps everything set, so your bars slice neatly and hold their layers. When ready, lift them out using the parchment paper, slice into squares, and enjoy your masterpiece. These Dutch apple pie bars are perfect on their own, but a scoop of vanilla ice cream or drizzle of caramel makes them downright dreamy.
Tips and Tricks for the best apple pie bars
The hardest part about this recipe is that you have to truly wait for it to cool down before slicing it up. The apples will have some extra juice and be so hot that if you start cutting into it too early, it won’t hold its shape. I let mine cool for about 30-45 minutes and it cut just fine.
Add caramel! You can easily turn these into salted caramel apple pie bars by drizzling them with caramel and sprinkling them with sea salt.
Should apple pie bars be refrigerated?
Leftover apple pie bars should be stored in the refrigerator in an airtight container.
Can apple pie bars be frozen?
Yes, apple pie bars can be frozen. They should be kept in an airtight container in the freezer for up to 6 months. Take them out individually and reheat as needed.
other apple recipes you might like
- Apple Pie Overnight Oats
- Caramel Apple Cheesecake Dip
- Apple Cinnamon Cupcakes
- Apple Cinnamon Cookies
- Apple Pull Apart Bread
If you make this recipe and love it, we would love a 5 ⭐️⭐️⭐️⭐️⭐️ rating! It helps us continue to provide free recipes.
Apple Pie Bars Recipe
Ingredients
- 3 large granny smith apples peeled and sliced (thin)
- 3/4 cup unsalted butter room temp
- 1/4 + 2 tbsp sugar
- 3/4 cup brown sugar
- 1 1/2 cup + 2 tbsp all purpose flour
- 1 tsp vanilla
- 1 tsp ground cinnamon
- 1/4 tsp ground nutmeg
- pinch of salt
Instructions
- Preheat the oven to 300 degrees.
- Cream together 1/2 cup room temperature butter with 1/4 cup sugar, vanilla, and salt for about 3 minutes, until fully combined and fluffy.
- Slowly add in 1 cup of flour, 1/4 cup at a time until mixed well and fully combined.
- Place the mixture into a parchment lined 9×9 or 8×8 glass dish.
- Bake for 12 minutes.
- While your crust is baking, combine apples, 2 tbsp flour, 2 tbsp sugar, cinnamon, and nutmeg in a bowl.
- Mix until apples are fully coated in the mixture, set aside.
- Mix 1/2 cup flour and brown sugar in a bowl.
- Add in remaining 1/4 cup of butter.
- With a whisk (that’s what I use), cut the butter into the mixture until it resembles chunky sand, set aside.
- Take the apples and layer them in 5 even layers over the crust.
- Once you layered all of the apples, cover the apples with the chunky sand like topping.
- Increase your oven temp to 350 and bake for 25 minutes.
- Allow it to completely cool before removing and cutting. Mine was ready to cut in about 30-45 minutes. Enjoy!
Notes
- Apple Variety: For the best flavor, use a mix of sweet and tart apples like Granny Smith and Honeycrisp. This adds depth and balance to the filling.
- Cutting the Butter: If your butter is too soft for the crumb topping, pop it in the fridge for a few minutes before cutting it into the flour mixture.
- Layering the Apples: Aim for five even layers of apples to get that “loaded” texture and flavor in every bite.
- Make-Ahead Tip: These bars taste even better the next day as the flavors meld together. They’re perfect for prepping ahead for a gathering or holiday!
- Serving Suggestion: Serve warm or at room temperature. A scoop of vanilla ice cream or a drizzle of caramel sauce makes them extra special.
- Storage: Store leftover bars in an airtight container in the fridge for up to 3 days. Let them come to room temperature before serving for the best texture.
Nutrition
Nutrition information is automatically calculated, so should only be used as an approximation.


Hi, I have a few questions.
Does the crust get pressed into only the bottom of the pan or should it be worked up the sides of the pan as well?
Also, should the crust be cooled before adding the apples, or straight out of the blind bake?
I look forward to making this.
Hi Tayelor,
The crust gets pressed just into the bottom of the pan, not up the sides. The crust does not need to be cooled before adding the apples. You can add the apples straight out of the oven. Hope you enjoy!
Another favorite in this house! Goes great with some hot coffee.