

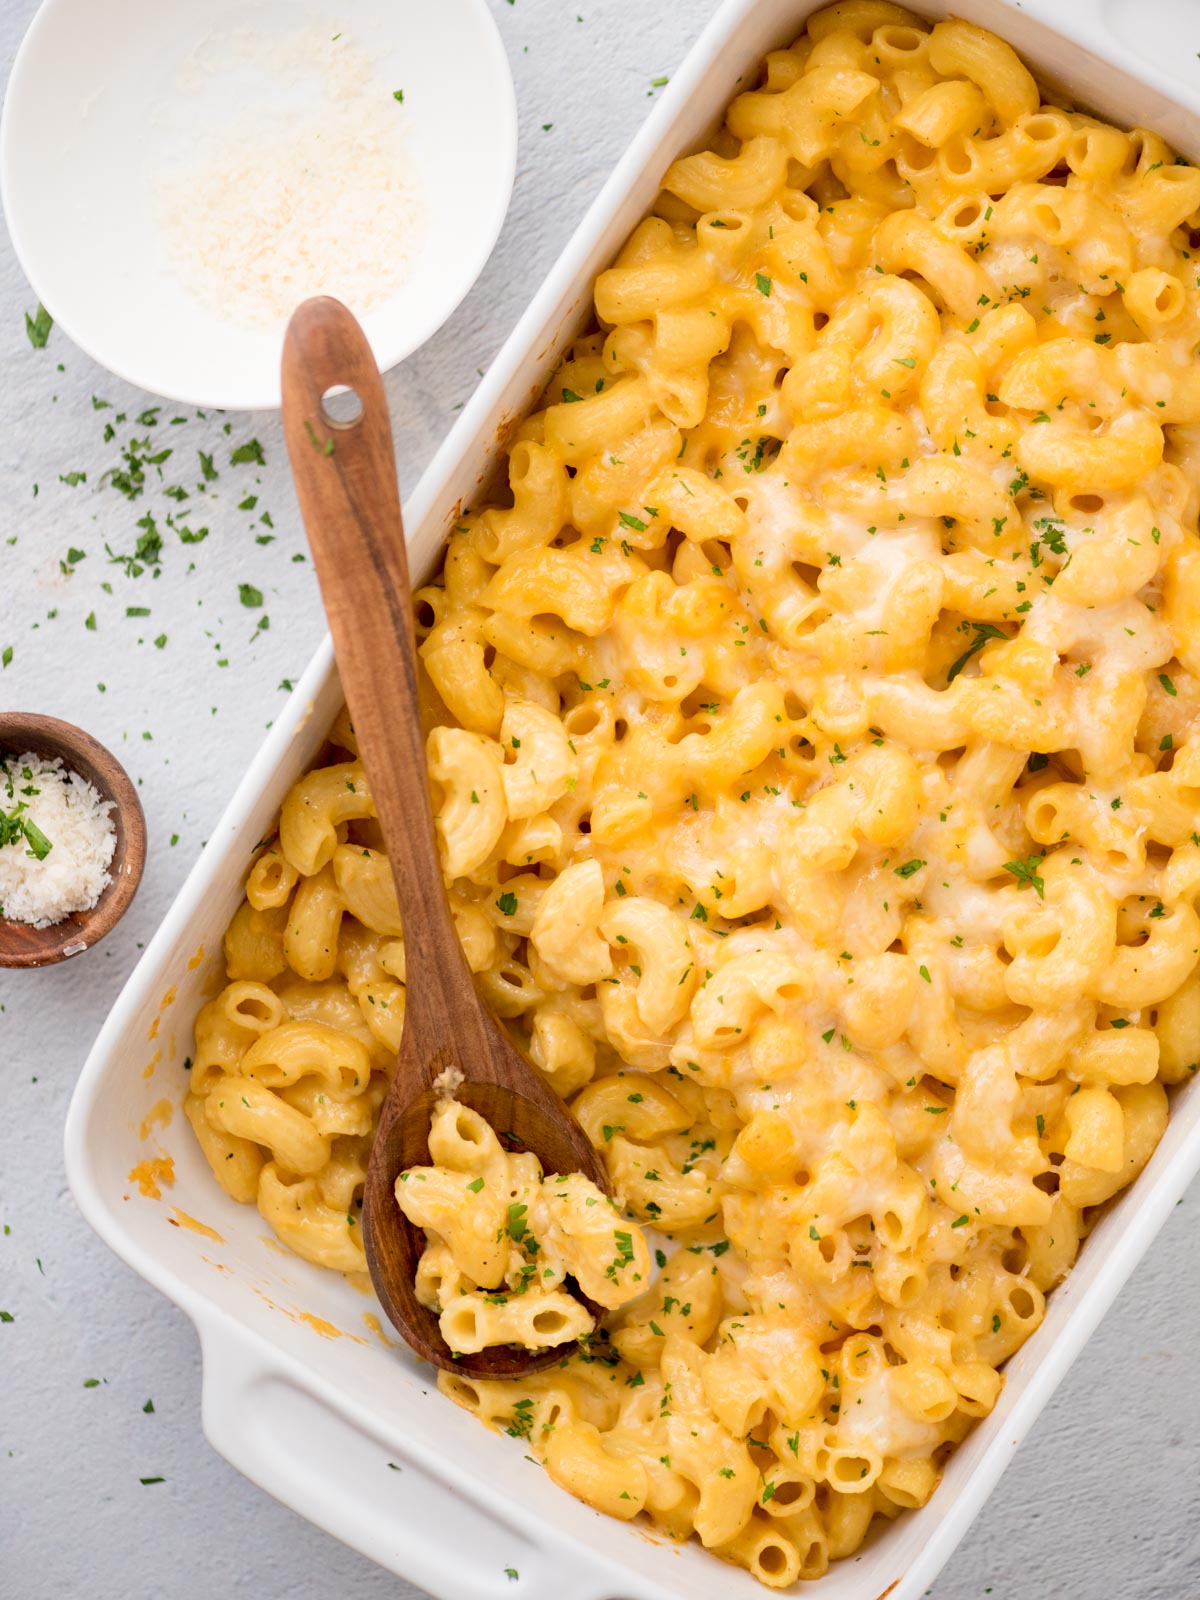
This baked homemade macaroni and cheese is the very best in comfort food. It’s creamy, tangy, and of course, so cheesy. It’s easy to make, family-friendly, and goes great with just about everything. It’s also perfect as a main dish meal all by itself.
Perfect Baked Mac n Cheese
The best homemade mac and cheese has a creamy sauce packed with flavor. Perfectly cooked pasta shells just swimming in a creamy and tangy cheese sauce.
Whether you serve it as a meal on its own or as a side dish, at family dinner or a dinner party, everyone will love it.
There is nothing quite like homemade macaroni and cheese. Creamy, bubbly, and so wonderful smelling and tasting. It’s the perfect comfort food.
This is the best mac and cheese that definitely doesn’t disappoint.
It’s the family-friendly sort of dinner that brings everyone together. Heck, once the kids smell what’s coming from the kitchen, they might even offer to set the table just so they can eat sooner!
Why You’ll Love this Recipe for Baked Macaroni and Cheese
There are so many reasons to love this homemade baked macaroni and cheese. But here are a few of my personal top reasons:
- It’s easy to make and totally family friendly.
- This baked mac and cheese is the ultimate comfort food.
- As perfect to make for a crowd or party as it is for a weeknight dinner.
- It isn’t dry like a lot of baked macaroni and cheese can be.
- It uses simple ingredients that are easy to find
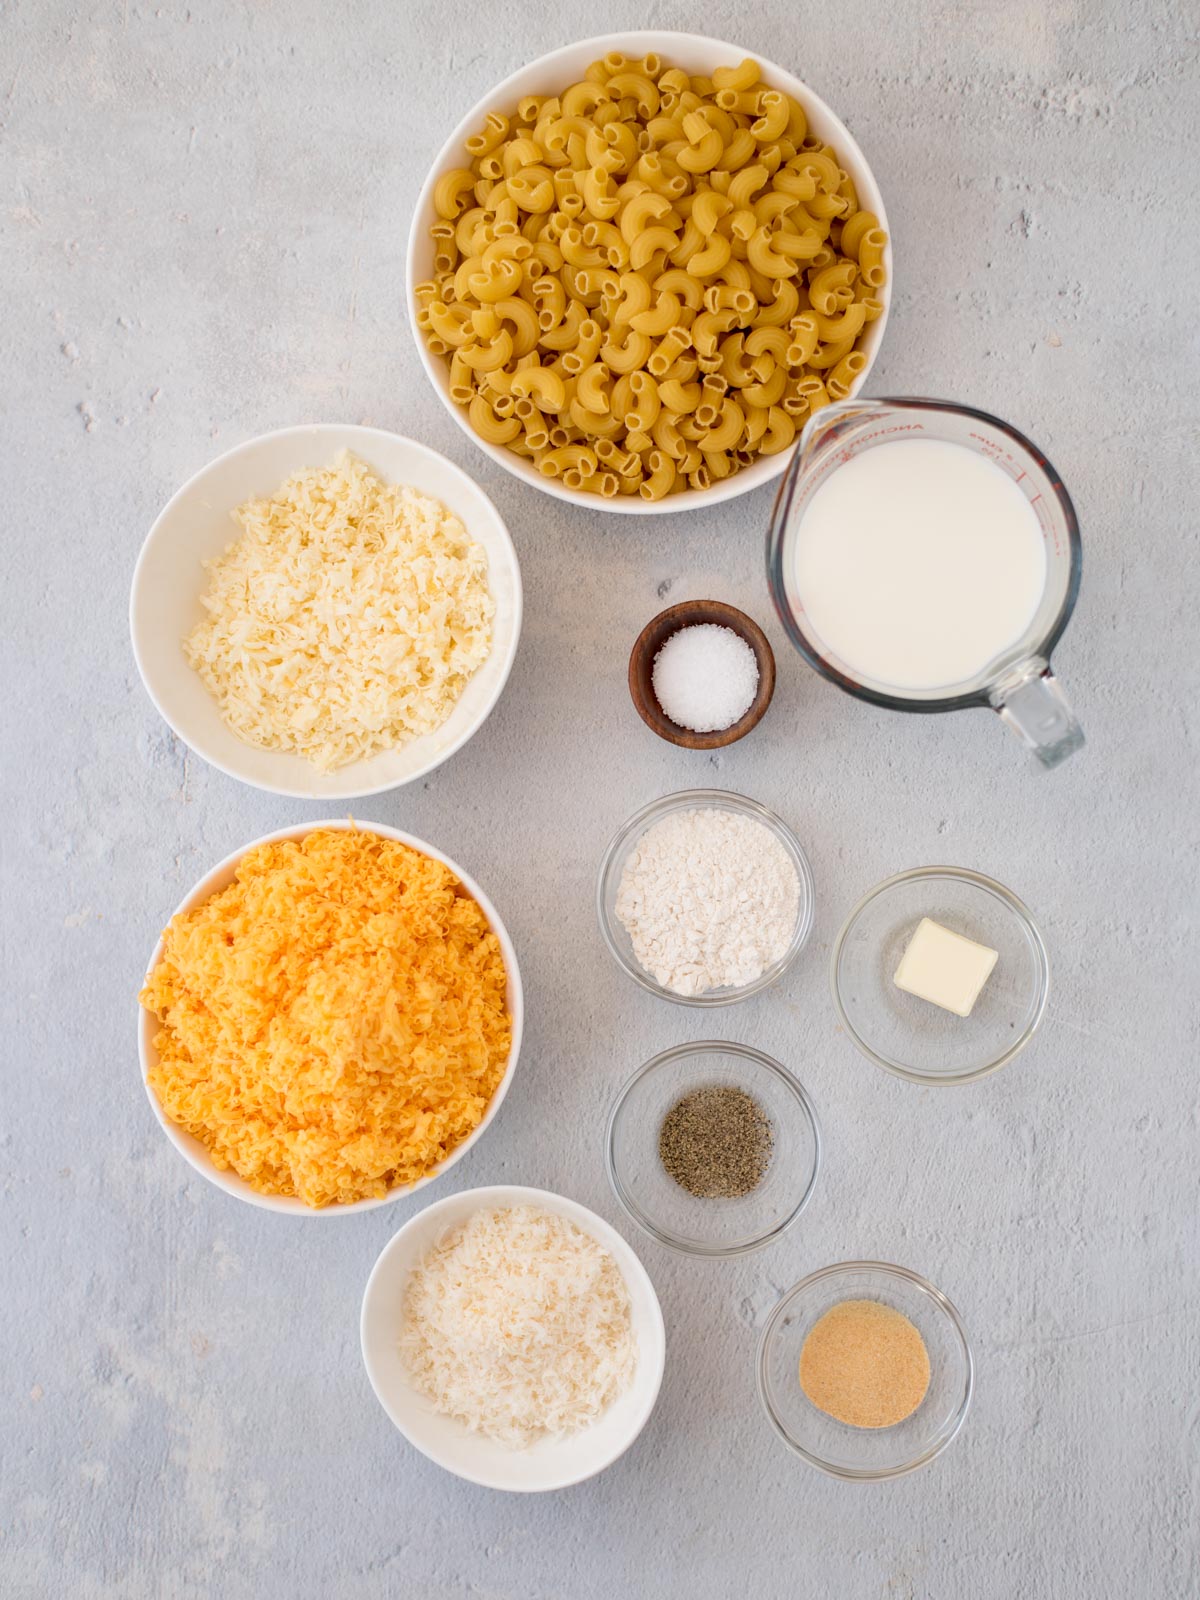
Homemade Baked Mac and Cheese Ingredients
- elbow macaroni, uncooked
- unsalted butter
- all purpose flour
- milk – use whole milk for the best results
- sharp cheddar cheese, grated (I do not recommend pre-shredded) – for the best flavor don’t use mild cheddar, it will get lost in the dish and you won’t be able to taste it
- garlic powder
- coarse kosher or sea salt – omit if using salted butter
- ground black pepper
- grated gruyere cheese (I do not recommend pre-shredded)
- grated parmesan (I do not recommend pre-shredded)
Baked Mac n Cheese Variations
- Pasta – You can use a similar shape/size of pasta for the elbow macaroni noodles. Just make sure the pasta you choose is able to stand up to the cheese sauce and won’t fall apart.
- Butter – Salted butter can be used. But be mindful of the salt content from the cheese and omit the additional salt from the recipe if using salted butter.
- Cheese – Try fontina, jarlsberg, gouda, muenster, or emmental cheese as a substitute for the gruyere.
- More Cheese – Instead of the parmesan cheese, you can use romano, romano pecorino, or asiago cheese.
- Spice It Up – For a spicy kick, you can add some cayenne pepper to the cheese sauce and top it with pepper jack cheese.
- Toppings – This version doesn’t have a crunchy topping, but if you want one, you can mix bread crumbs with melted butter before baking.
- Make It Creamier! – For an extra decadent creamy mac n cheese, you can replace some of the milk with heavy cream.
- The Classic Cheese Pull – If you like a really great quintessential cheese pull when serving your macaroni, you can add some monterey jack or mozzarella cheese in with the topping. Even a little colby jack will give you some great cheese pulls.
How to Make Creamy Baked Mac and Cheese
It may seem like there’s a lot going on. But this macaroni and cheese is surprisingly easy to make. Cook the pasta, make the cheese sauce, combine, top with more cheese, and bake. Simple!
- Preheat the oven to 375°F.
- Spray a 9×13 baking dish with avocado oil spray and set aside.
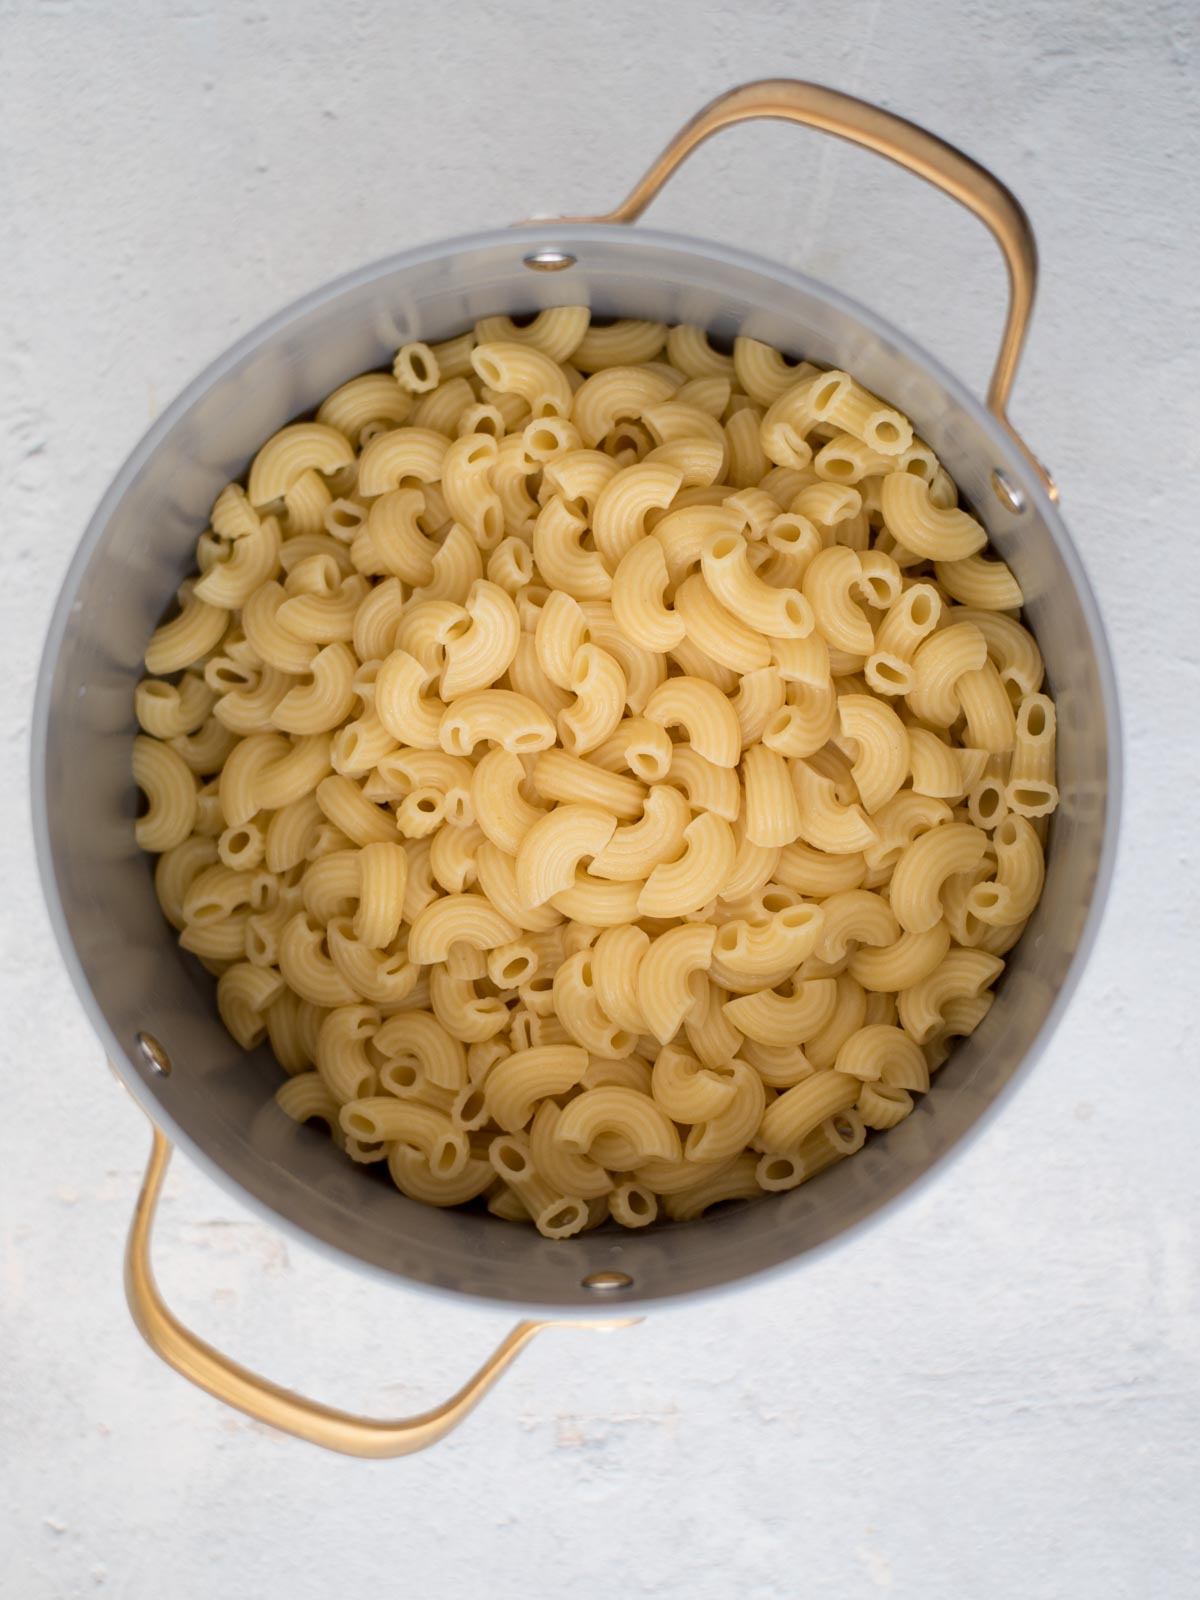
- Bring a large pot of water to a rolling boil.
- Add the elbow macaroni and cook until al dente.
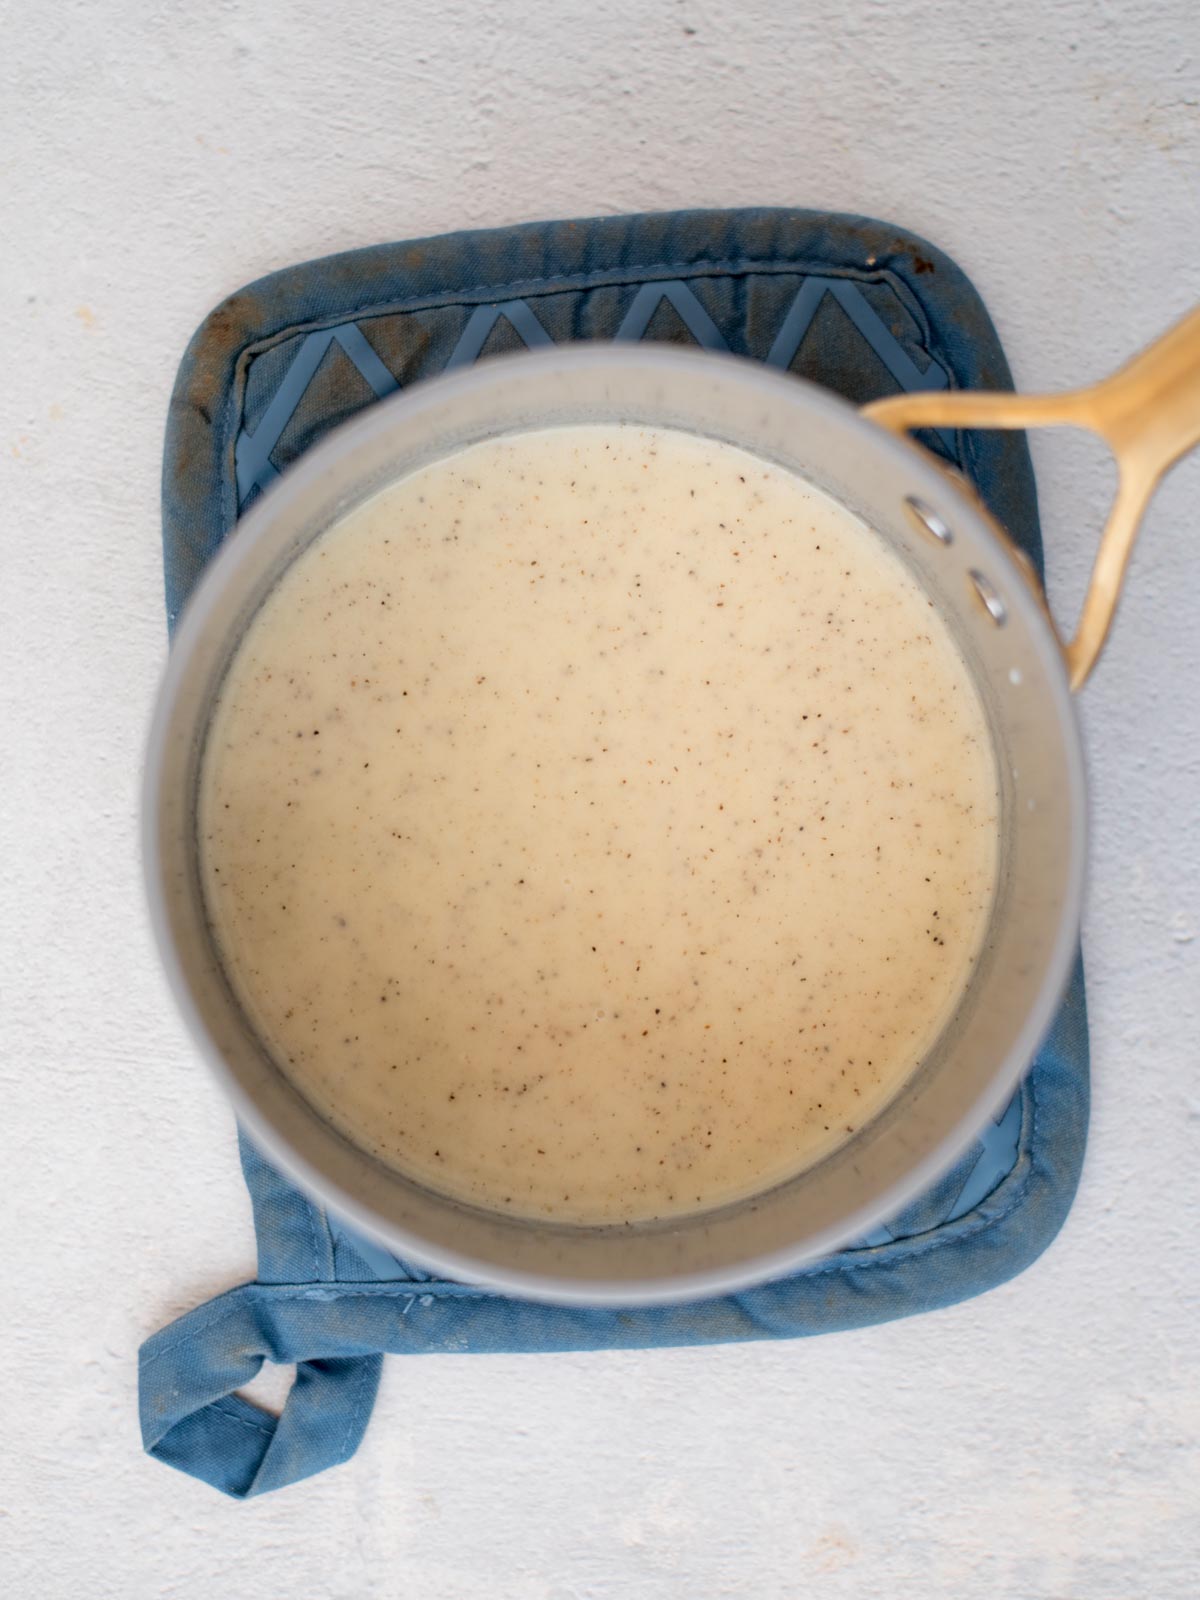
- While the pasta is cooking, add the butter to a saucepan over medium heat.
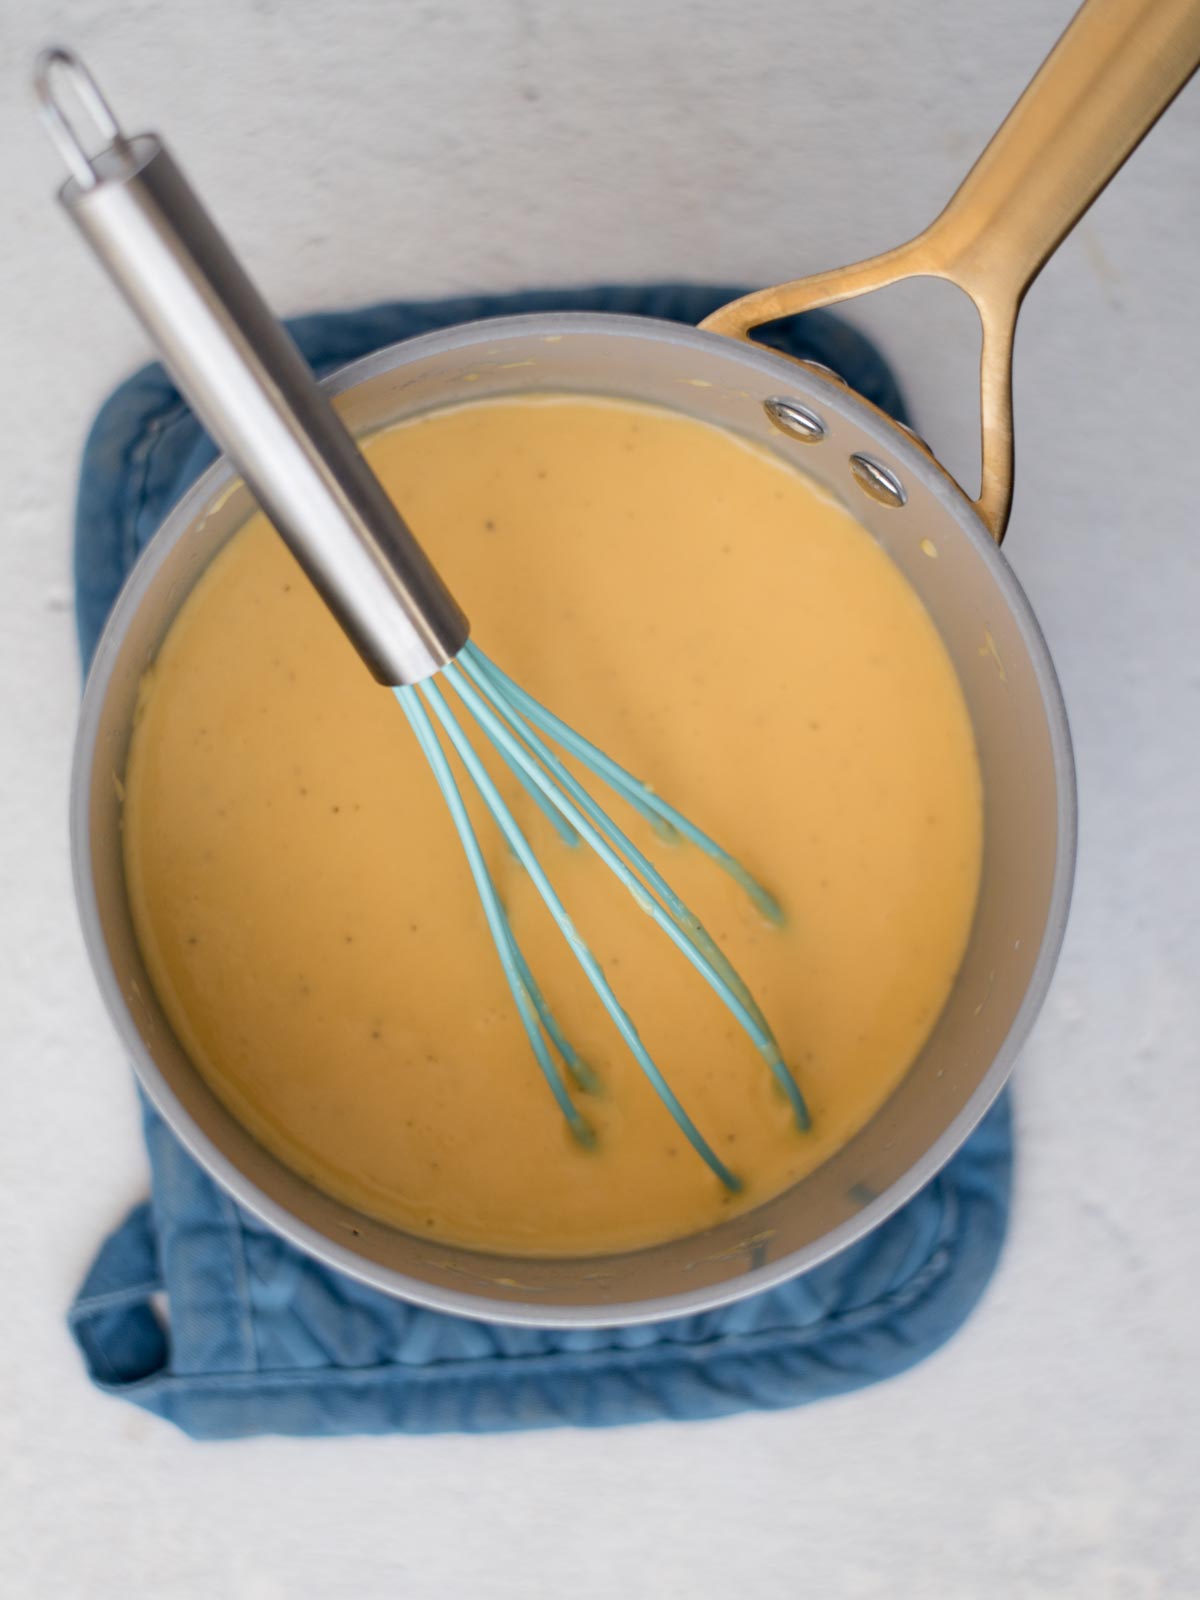
- Once the butter has melted, add the flour and whisk. Whisk until it is smooth and makes a roux.
- Slowly pour in the milk, whisking continuously. You want to keep it smooth. Be sure to whisk out any clumps.
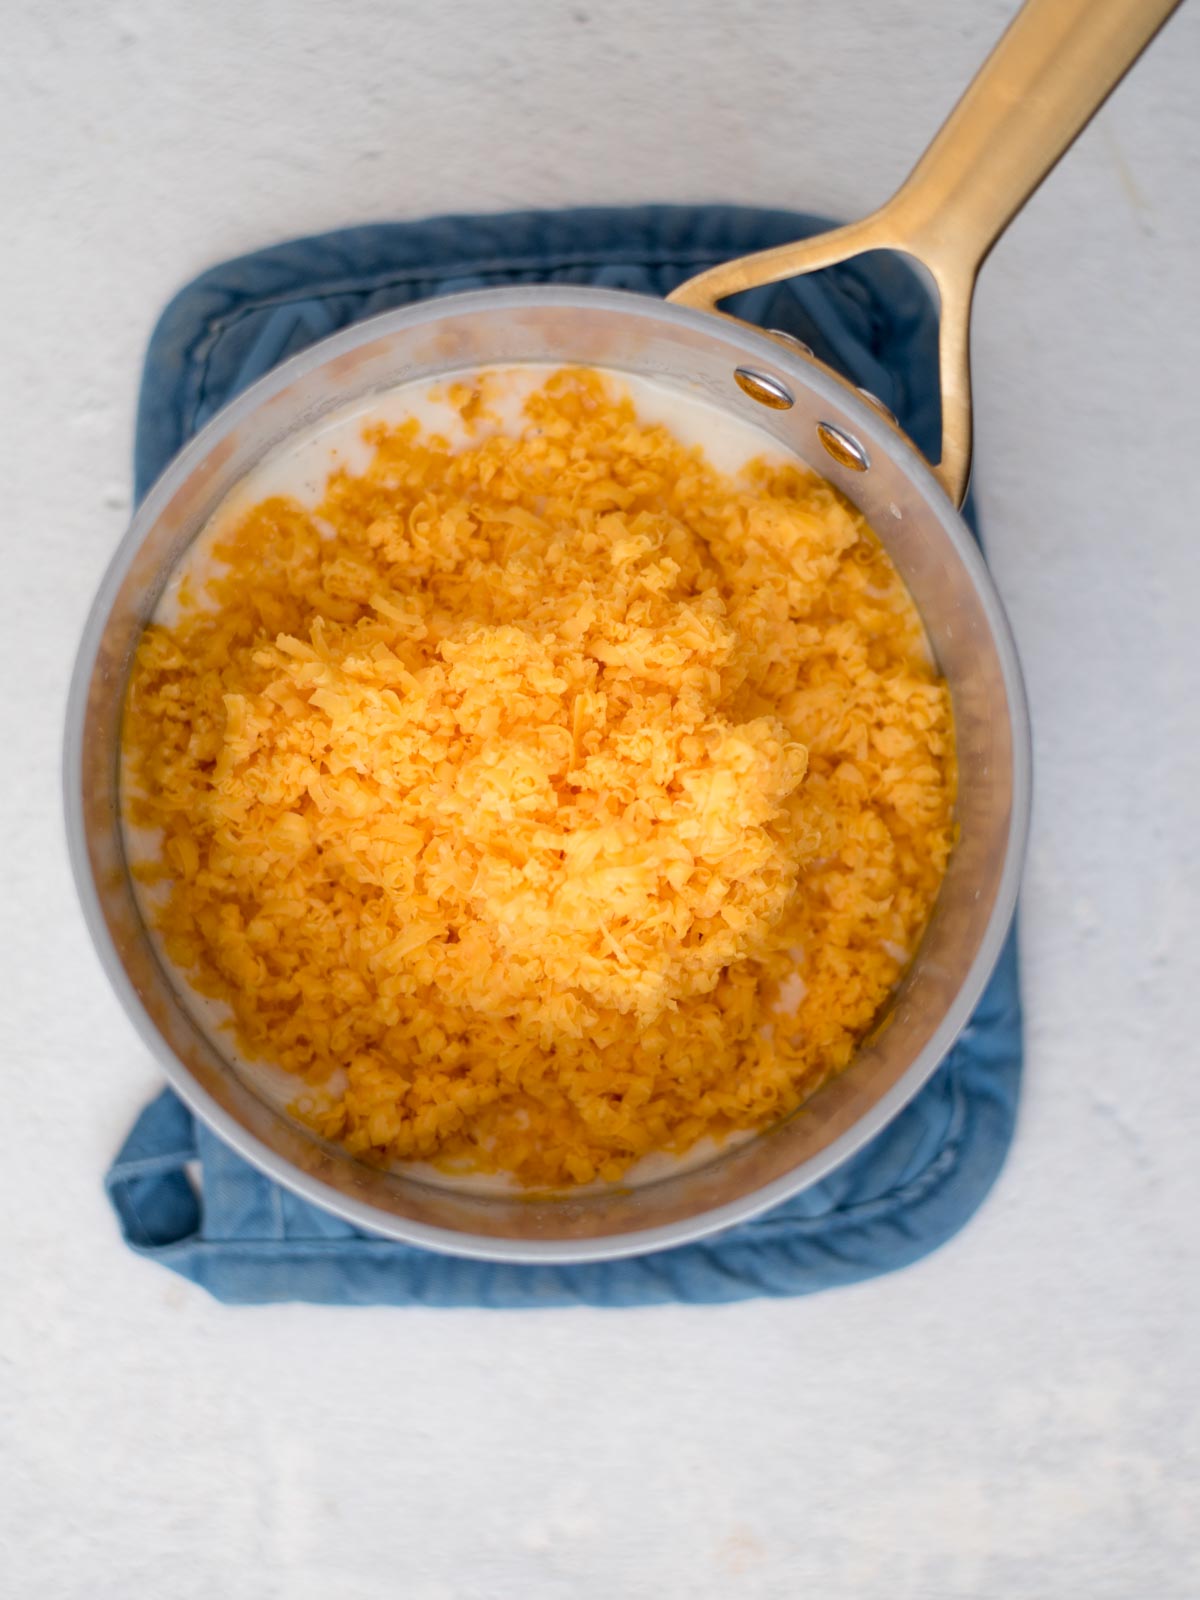
- Turn off the heat and add in the cheddar cheese, garlic powder, salt, and pepper.
- Mix together until it is smooth and creamy.
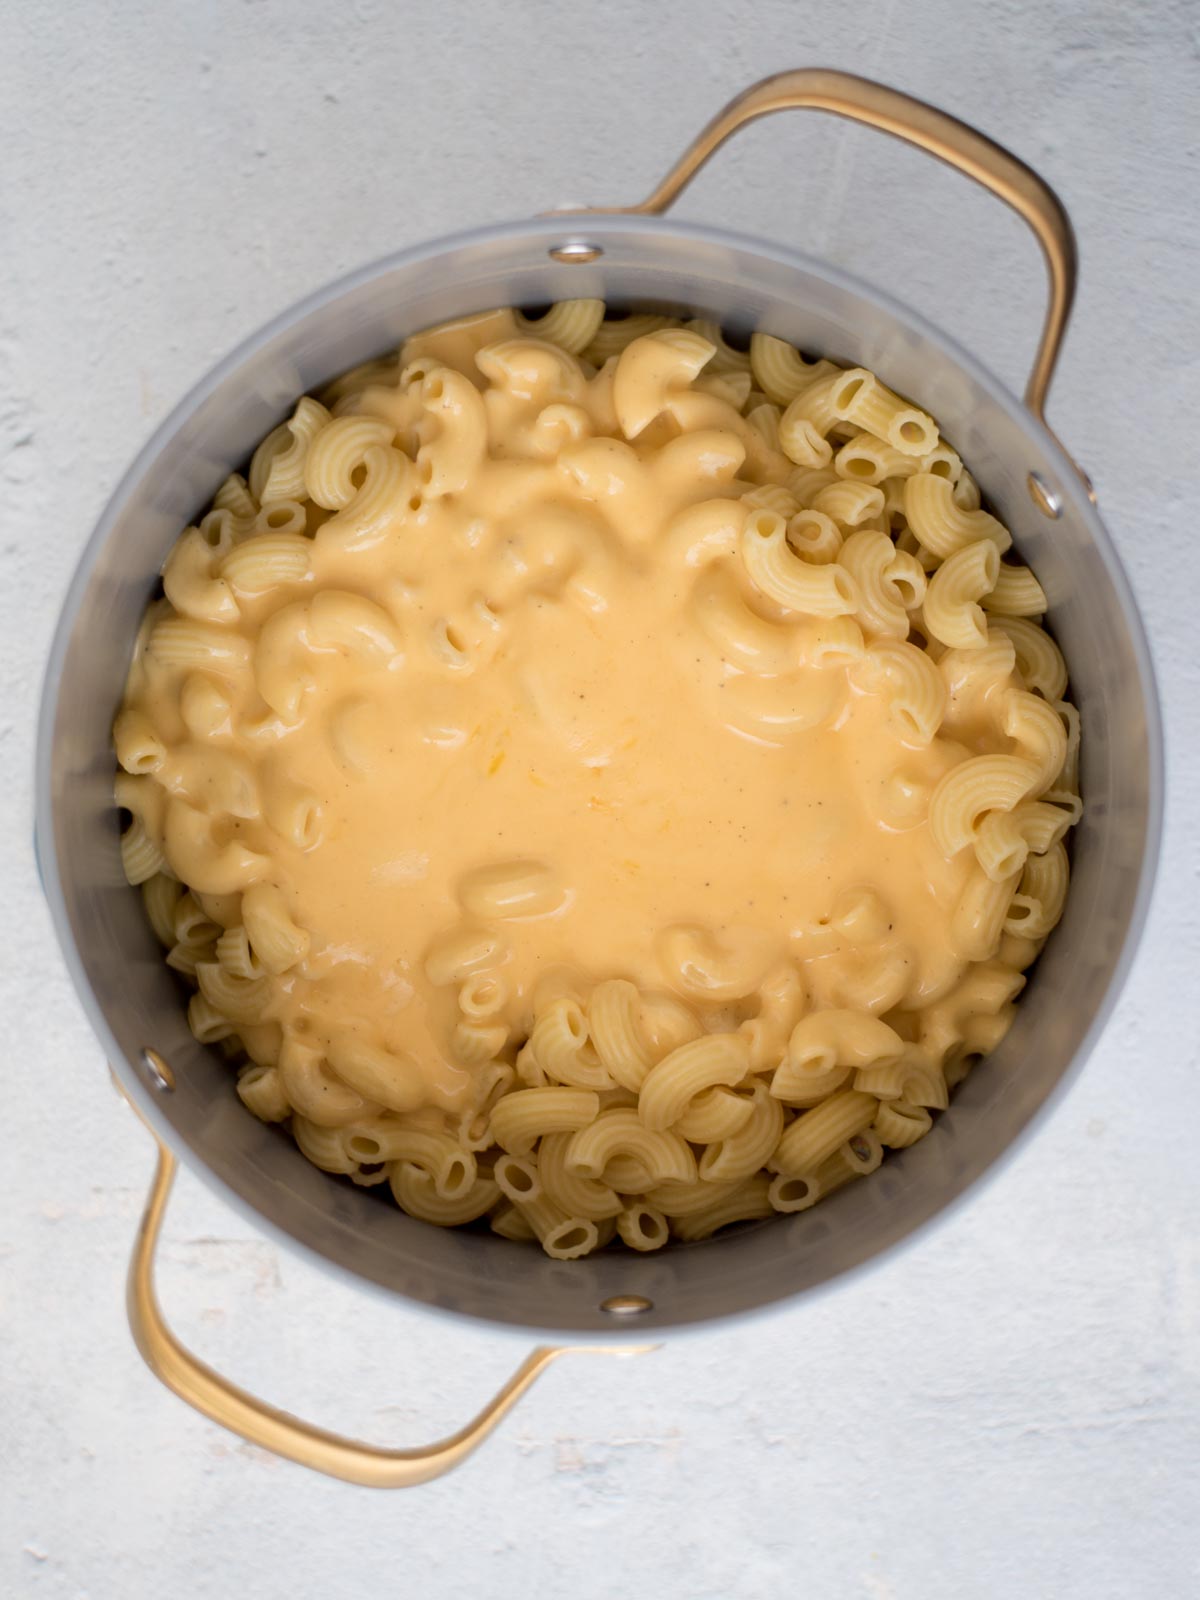
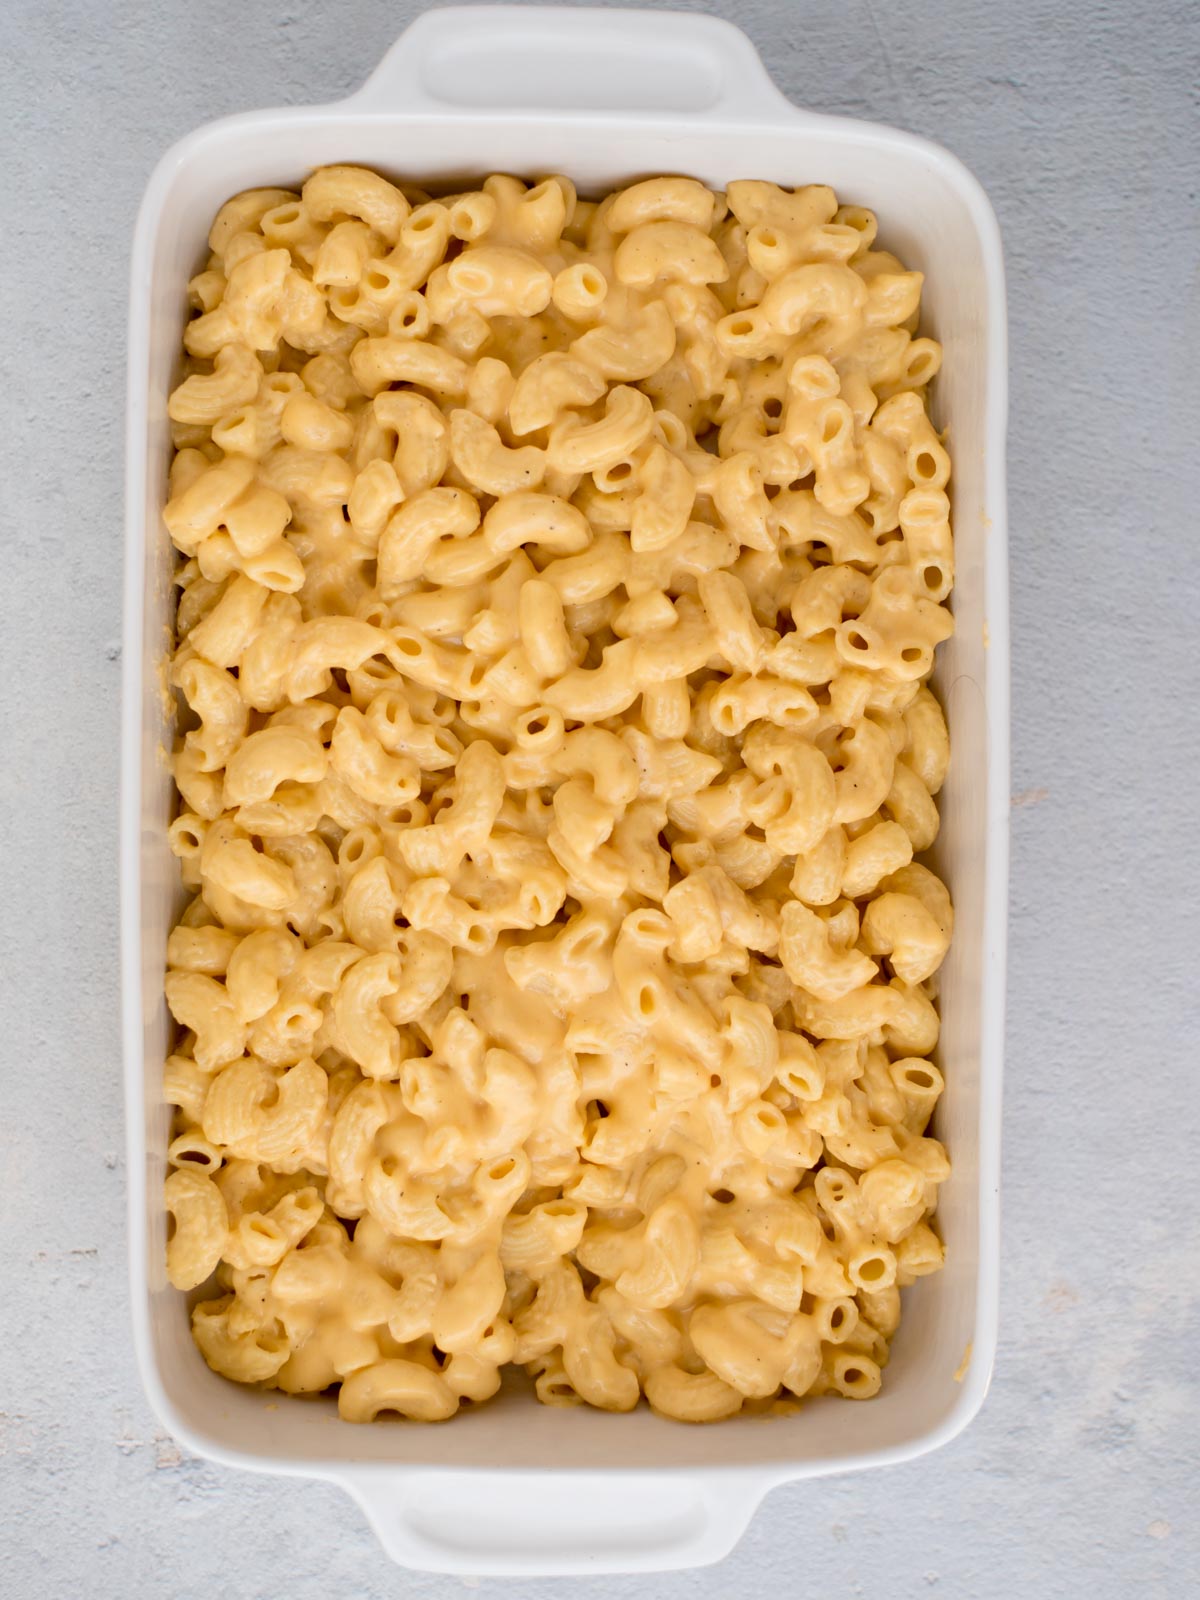
- Drain the pasta and return it to the pot.
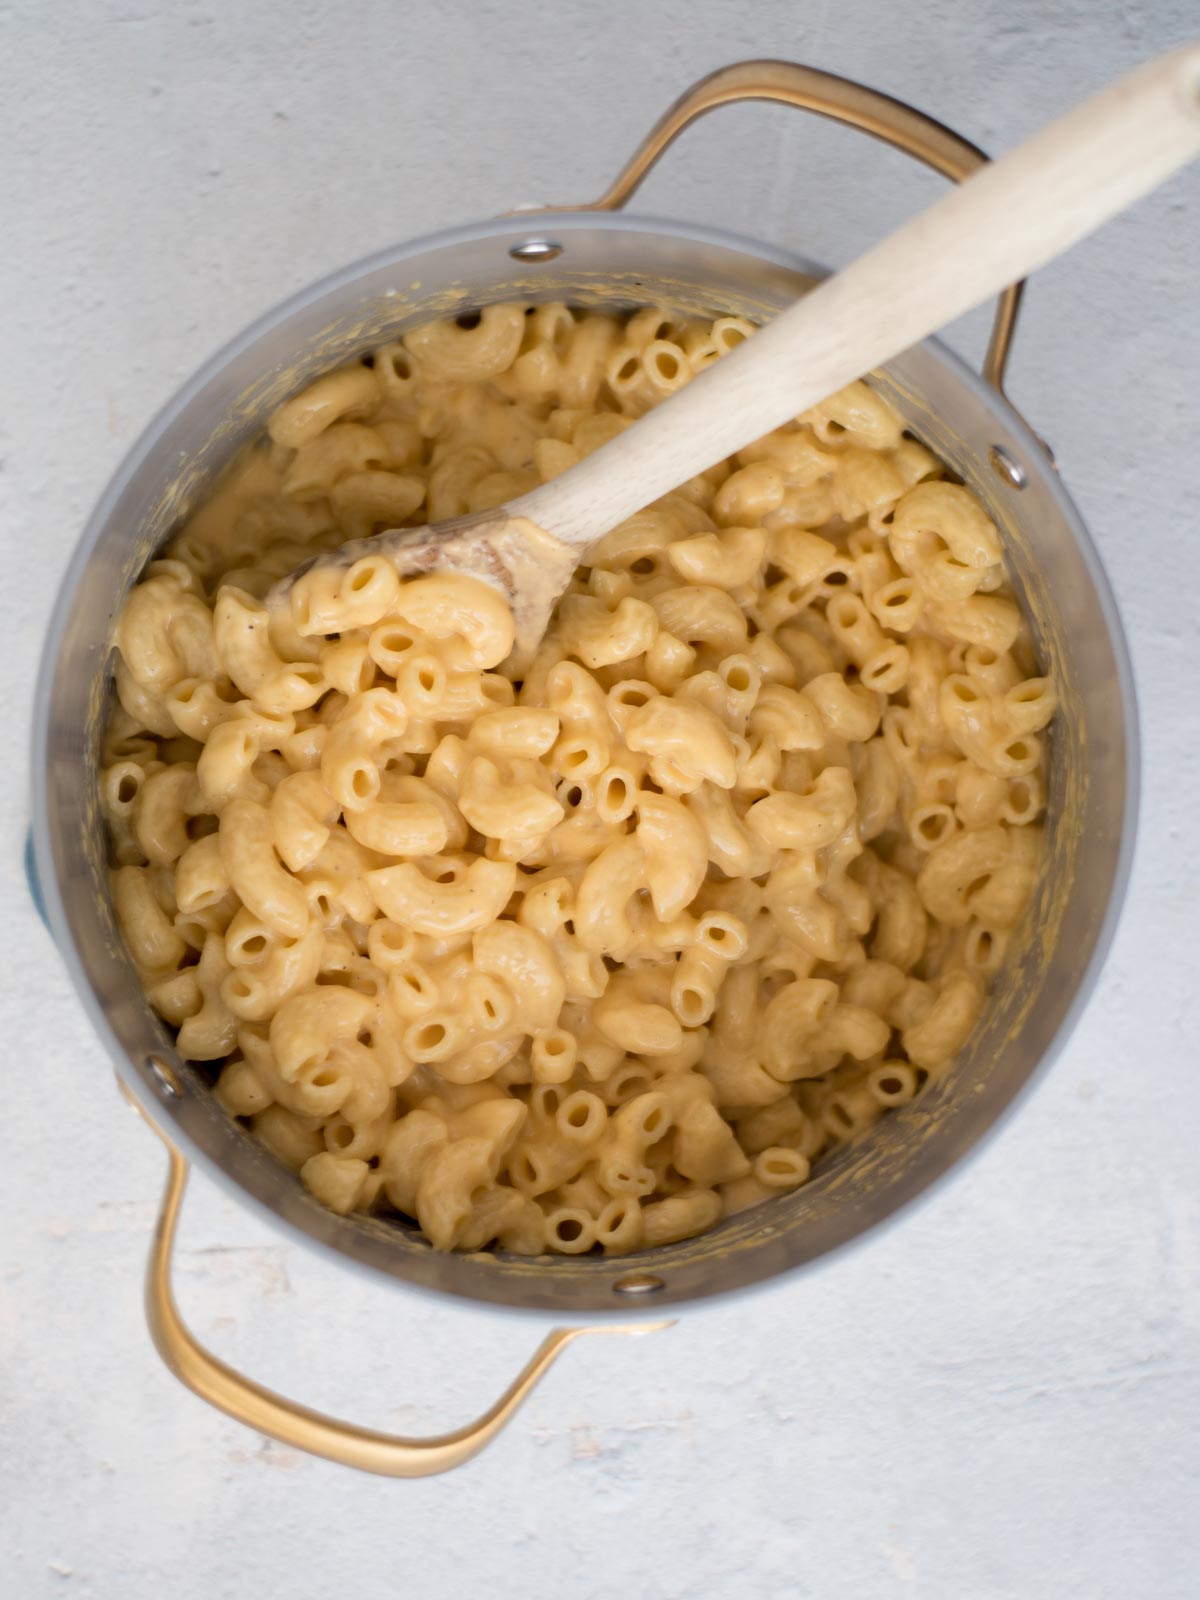
- Pour in the cheese sauce and mix it until all of the cooked macaroni is covered.
- Pour the pasta into the lightly greased casserole dish and spread it evenly.
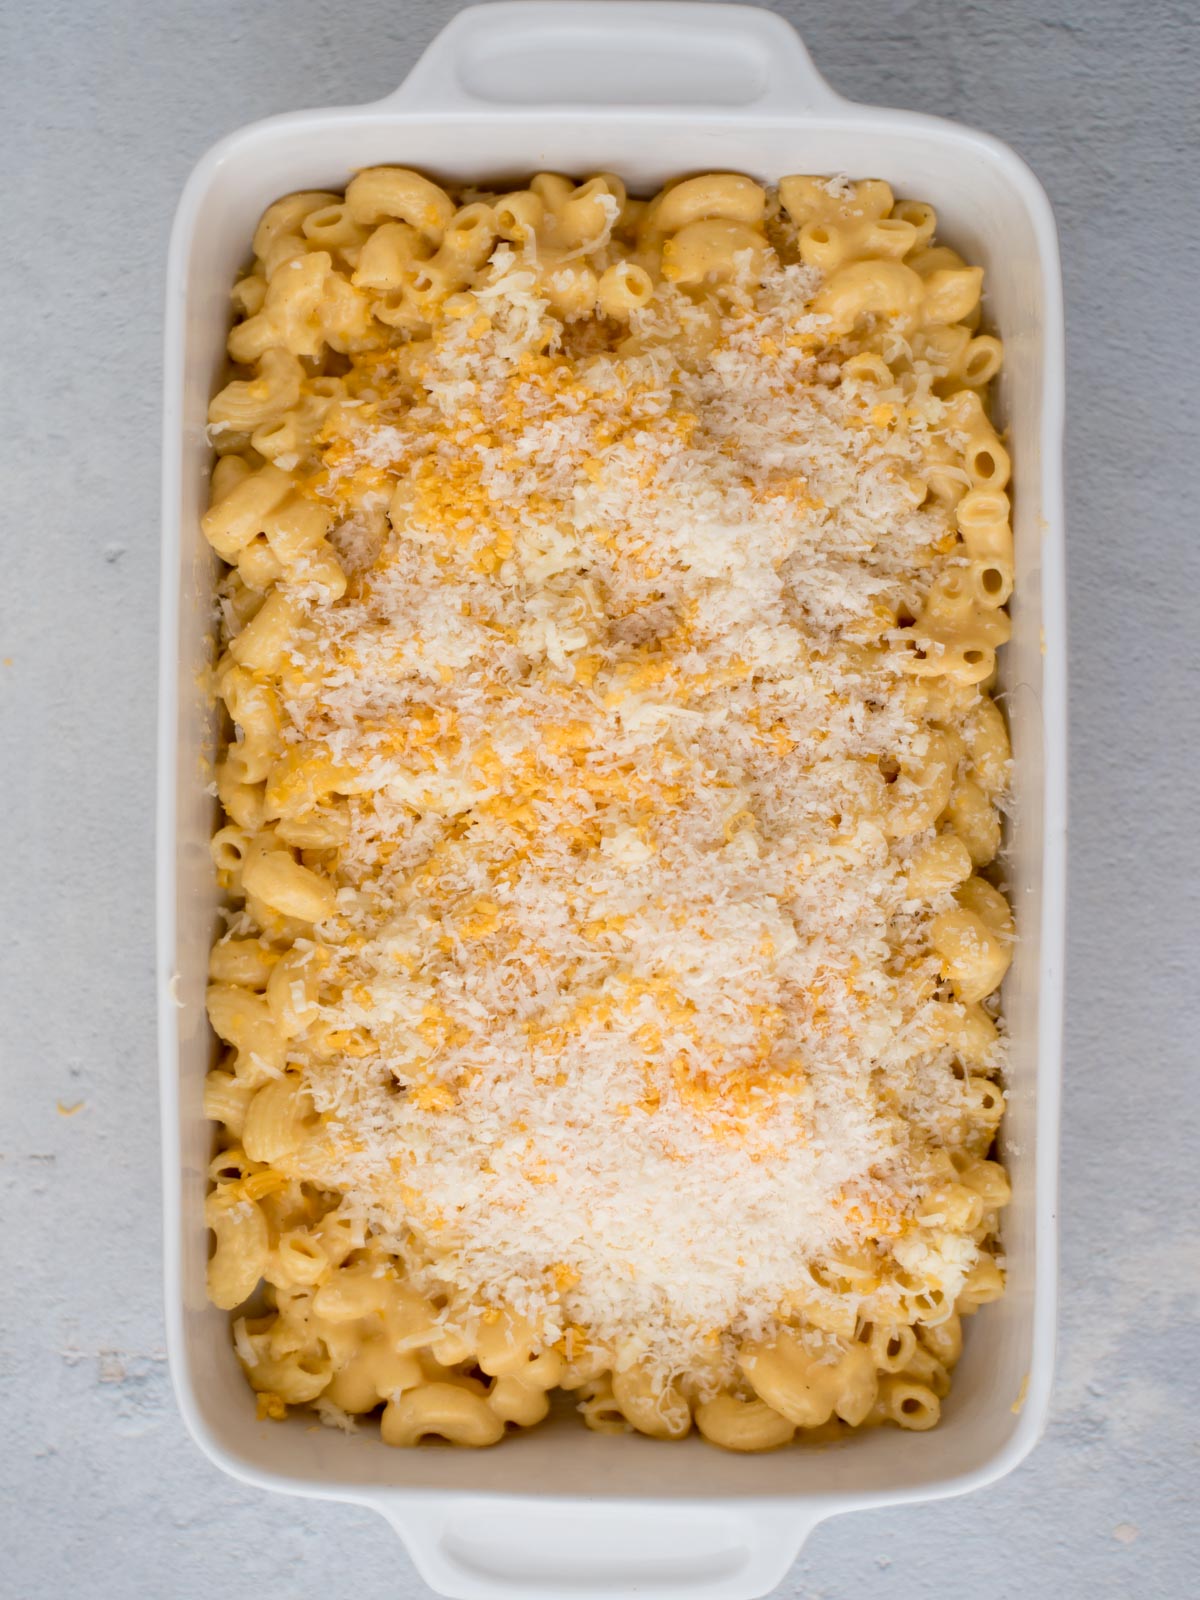
- Top the pasta with the gruyere and parmesan cheese.
- Bake in the oven for 10-15 minutes, just until the cheese is melted and bubbly.
- Remove from the oven and enjoy!
Tips for Cheesy Baked Mac and Cheese
Here are some of my best suggestions to ensure you get the best results from this recipe.
- Freshly shredded cheese is best. I don’t recommend using pre-shredded cheese because the anti-caking agent used to keep it from sticking together in the package also prevents it from having a smooth, creamy melted texture. I always recommend grating your own cheese for this recipe.
- When making the creamy cheese sauce, it’s important to make sure your roux is smooth to avoid having clumps in the finished sauce.
- Warm the milk a little on the stove or in the microwave before adding it to the roux to help avoid clumping. Make sure you are pouring it in slowly.
- Use whole milk to achieve the creamiest results.
- I don’t recommend replacing the sharp cheddar with a milder version. You’ll lose a lot of that big cheesy flavor. And you definitely don’t want that!
- Don’t bake the macaroni and cheese too long or you risk drying it out. And don’t leave it to cool in the oven you just shut off or it will definitely dry out.
Equipment Needed
 Buy Now →
  Buy Now →
  Buy Now →
  Buy Now →
  Buy Now →
  Buy Now →
  Buy Now →
 How to Serve Homemade Baked Mac and Cheese
You can serve a large portion of this macaroni and cheese recipe as a meal itself or serve it as an amazing side dish with:
- Buffalo Chicken Sliders
- Oven-Baked Ribs
- Smoked Chicken Breast
- Boneless Chicken Wings
- BBQ Pulled Pork Sandwiches

How to Store Creamy Baked Mac and Cheese
Allow extra mac and cheese to cool completely before refrigerating or freezing.
Store: Store any leftover mac and cheese in an airtight container in the refrigerator. Properly stored, leftovers will be good for up to 5 days.
Freeze: You can also freeze leftovers in airtight containers or well-sealed freezer bags for up to 3 months. I like to use my Souper Cubes to freeze leftovers in individual or two-person portion sizes for easier reheating.
How to Reheat Leftover Mac and Cheese
Reheat refrigerated mac and cheese in the microwave. Add about 1/2 teaspoon of milk or water per serving and cover with a paper towel or microwave-safe lid.
Microwave at full power for 2-3 minutes until heated through.
Defrost frozen leftovers in the microwave at 50% power for about 5 minutes. Then add a little milk or water and heat at full power for 2-3 minutes until hot.
Frequently Asked Questions
There are so many great combinations for mac and cheese that it would be almost impossible to list them all.
One thing most people agree on, they all start with freshly shredded sharp cheddar. It’s the best cheese to use for classic mac and cheese.
From there you can add your gruyere, gouda, brie, parmesan, comte, muenster, or mozzarella! Just make sure that the cheese you choose melts well and doesn’t break under heat when melting.
There are actually quite a few reasons your mac and cheese is not creamy.
The first is that you may have overbaked the macaroni and cheese by leaving it in the oven too long. This often happens when people leave the dish to “cool” in a hot oven after turning it off.
Another is that you may have undercooked your pasta too much and that has absorbed more of the liquid when baking.
Lastly, if you are using pre-packaged shredded cheese instead of fresh shredded you won’t get the same results. Pre-shredded cheese has anti-caking agents added that don’t let it melt as smoothly.
Some longer-cook recipes require you to cover the dish with aluminum foil while baking. This recipe does not require the baking dish to be covered.
It’s important to add flour to baked mac and cheese to develop a roux. The roux will provide a creamy consistency for the cheese sauce so that it isn’t runny or grainy.
Baked mac and cheese can become bland when it hasn’t been seasoned properly and when too mild of cheeses are used. When you’re choosing cheeses, you want to avoid things like mild cheddar whose taste get lost in the dish.
Mac and cheese can become oily after baking from the cheese. It’s important to choose a cheese that isn’t pre-shredded and that doesn’t have the highest fat content.
Covering baked mac and cheese before putting it in the oven not only helps it from becoming too brown on top, but it will also help prevent it from drying out. No one likes a crusty, dry mac and cheese!
More like this Cheesy Baked Mac and Cheese Recipe:
- Smoky Mac and Cheese
- Twice Baked Potatoes
- Cheesy Au Gratin Potatoes
- Garlic Parmesan Roasted Broccoli and Cauliflower
If you make this recipe and love it, we would love a 5 ⭐️⭐️⭐️⭐️⭐️ rating! It helps us continue to provide free recipes.
Creamy Baked Mac and Cheese Recipe

Ingredients
- 16 ounces elbow macaroni uncooked
- 4 tablespoons unsalted butter
- 1/4 cup all purpose flour
- 1 1/12 cups milk
- 8 ounces sharp cheddar cheese grated (I do not recommend pre-shredded)
- 1 teaspoon garlic powder
- 1 teaspoon coarse kosher or sea salt
- 1/2 teaspoon ground black pepper
- 1/2 cup gruyere cheese grated; I do not recommend pre-shredded
- 1/4 cup parmesan grated ; I do not recommend pre-shredded
Instructions
- Preheat the oven to 375°F.
- Spray a 9×13 baking dish with avocado oil spray and set aside.
- Bring a large pot of water to a rolling boil.
- Add the elbow macaroni and cook until al dente.
- While the pasta is cooking, add the butter to a saucepan over medium heat.
- Once the butter has melted, add the flour and whisk. Whisk until it is smooth and makes a roux.
- Slowly pour in the milk, whisking continuously. You want to keep it smooth. Be sure to whisk out any clumps.
- Turn off the heat and add in the cheddar cheese, garlic powder, salt, and pepper.
- Mix together until it is smooth and creamy.
- Drain the pasta and return it to the pot.
- Pour in the cheese sauce and mix it until all of the pasta is covered.
- Pour the pasta into the baking dish and spread it evenly.
- Top the pasta with the gruyere and parmesan cheese.
- Bake in the oven for 10-15 minutes, just until the cheese is melted and bubbly.
- Remove from the oven and enjoy!
Video
Notes
- I don’t recommend pre-shredded cheese because the anti-caking agent used prevents it from having a smooth, creamy melted texture
- When making the cheese sauce, it’s important to make sure your roux is smooth to avoid having clumps in the cheese sauce.
- I don’t recommend replacing the sharp cheddar with mild or medium. You’ll lose a lot of the cheesy flavor.
- Don’t bake it too long or you risk drying it out.
Nutrition
Nutrition information is automatically calculated, so should only be used as an approximation.


This homemade baked mac and cheese is a culinary masterpiece! Its velvety, cheesy goodness is a pure delight, and my kids couldn’t get enough of it. I would highly recommend giving this recipe a try!
I added some crispy bacon bits to this recipe, and it took it to another level. So indulgent and delicious. A definite crowd-pleaser.
I tried making this once and I loved it so much. I have two picky eaters at home and lo and behold – they devoured it and even came back for seconds. Lol. But kidding aside, this baked mac and cheese is gold! Try this if you love a creamy, cheesy, and crunchy dish that’s super easy to make!
Creamy, tangy, and so cheesy. Super easy, family-friendly, and a perfect main dish all on its own.
We tested this recipe out last night because we are planning our Thanksgiving menu. The boys all loved it so it is definitely going on the list. Who doesn’t love mac and cheese?? And this one was creamy and delicious!
There’s nothing quite as comforting as homemade mac and cheese. I usually doctor it up but wanted something classic this time and this recipe was perfect! We enjoyed it as a side with some pork chops and the whole dish was finished!
We made this for dinner last night and it turned out so delicious. I loved how easy it is to make the roux. It didn’t turn out clumpy at all. The mac and cheese practically melted in my mouth. So, I know I will be making these meal frequently.